
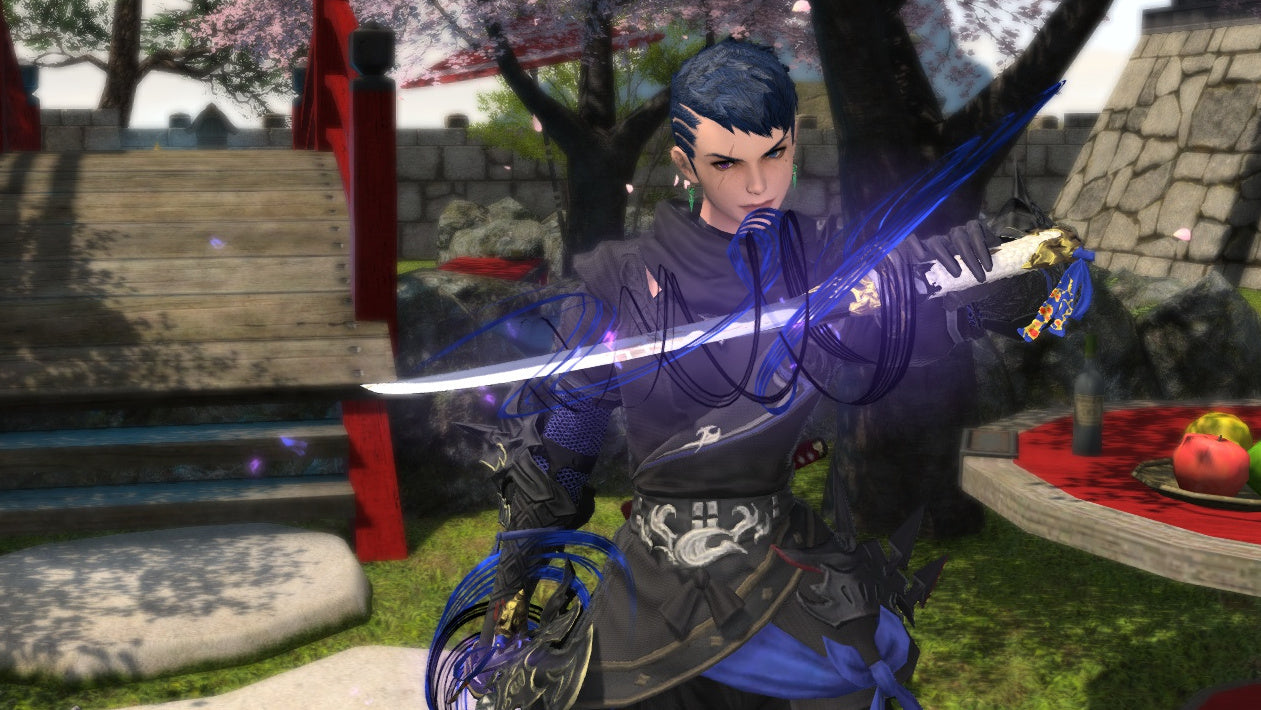
The Ultimate Samurai Job Guide for FFXIV: Endwalker Patch 6.4 - Unleash Your Inner Warrior
In the epic realm of Final Fantasy XIV, the Samurai job stands tall as a formidable melee DPS powerhouse. Armed with a razor-sharp katana, Samurais harness their immense skill to build up Sen and Kenki, unleashing devastating combo attacks that strike fear into the hearts of their enemies. Are you ready to embrace the way of the warrior and master the art of the Samurai? Look no further! In this comprehensive guide, we will walk you through everything you need to know about the Samurai job in Final Fantasy XIV's latest expansion, Endwalker.
Unlocking the Way of the Samurai
Before you can embark on your journey as a Samurai, you must first prove your mettle by completing a quest in the bustling city of Ul'dah. Once you have attained the impressive milestone of reaching Level 50, the path to becoming a Samurai becomes open to you. Unlike other jobs in Final Fantasy XIV, the Samurai job does not stem from a base class, allowing you to directly dive into the exhilarating world of this sword-wielding powerhouse.
Mastering the Samurai's Unique Mechanics
Samurais are known for their distinct gameplay mechanics, relying on two key resources: Sen and Kenki. Sen represents the three vital forces that fuel a Samurai's devastating attacks: Setsu (Snow), Getsu (Moon), and Ka (Flower). As you execute your arsenal of techniques, you will accumulate these three forces, ultimately empowering your strongest abilities. Kenki, on the other hand, serves as a secondary resource that fuels additional skills, granting you even more versatility and potency in battle.
Unleashing the Perfect Combos
To fully unleash the potential of a Samurai, mastering the art of combos is essential. By skillfully combining Sen and Kenki, you can execute powerful attacks that strike fear into your foes. The harmony of your strikes and the precision of your timing will determine the devastating impact you have on the battlefield. Whether it's unleashing Higanbana, a lethal damage-over-time attack, or gracefully executing Midare Setsugekka, a high-damage finishing move, every strike will leave your enemies in awe of your skill and prowess.
Optimizing Your Samurai's Gear and Abilities
As a Samurai, your weapon of choice, the katana, plays a crucial role in your journey to greatness. Discovering and obtaining the most potent katanas available will significantly enhance your damage output. Moreover, exploring the vast array of armor sets and accessories tailored for Samurai will grant you valuable stat bonuses and further amplify your performance on the front lines.
Endwalker Patch 6.4: Unleash Unprecedented Power
With the release of Endwalker Patch 6.4, the Samurai job receives exciting updates and enhancements. From new abilities and traits to rebalanced mechanics, this patch introduces a host of thrilling gameplay changes that elevate the Samurai's potential to unprecedented heights. Stay ahead of the curve by delving into the intricacies of these updates and adapting your playstyle accordingly.
Embark on Your Samurai Journey Today
The way of the Samurai is not for the faint of heart, but for those who seek glory on the battlefield, it offers unparalleled satisfaction. Now armed with this comprehensive guide, you are ready to don the robes of the Samurai and carve your name into the annals of Final Fantasy XIV history. Embrace the path of honor, skill, and sheer devastation as you become the ultimate Samurai in Endwalker Patch 6.4.
Remember, your katana awaits. Seize it and let the world tremble before your unmatched prowess!

Deep Dungeon & Criterion Dungeon Boost
If you're seeking to conquer the most challenging content in Final Fantasy XIV and obtain rare and coveted rewards, Simple Carry is the ideal solution. As a dedicated website, Simple Carry specializes in providing carry services for Deep Dungeons such as Palace of the Dead, Heavens on High, Eureka Orthos, as well as Variant & Criterion Dungeons. With a team of experienced players, Simple Carry is committed to helping you unlock the desired rewards efficiently and with ease.
Deep Dungeons, including Palace of the Dead and Heavens on High, offer thrilling challenges and unique rewards. Simple Carry's team of experts possesses comprehensive knowledge of these dungeons, their mechanics, and the most effective strategies to overcome them. By collaborating closely with players, they provide invaluable guidance and support to ensure successful completion of these dungeons, granting you access to the rare and highly sought-after rewards they offer.
In addition to Deep Dungeons, Simple Carry's carry services extend to Variant & Criterion Dungeons. These dungeons provide further opportunities for unique rewards, glamour accessories, mounts, titles, and more. The experienced players at Simple Carry work diligently to optimize character builds, develop effective strategies, and navigate the challenging encounters within these dungeons, enabling you to unlock the rewards you desire efficiently.
By choosing Simple Carry's carry services, you can save time and effort while embarking on the journey to conquer these demanding dungeons. With the expertise and guidance of their team, you can unlock rare and highly coveted rewards, including glamour accessories, mounts, titles, and more, in a quick and efficient manner.
Unlock the Art of Samurai: Embrace the Way of the Blade in Final Fantasy XIV
If you seek the thrill of wielding a katana and yearn for the power of a high-damage melee job, then the Samurai in Final Fantasy XIV is your destined path. As a formidable warrior, the Samurai's playstyle revolves around dealing massive damage without the burden of party utility. Prepare to immerse yourself in the art of swordplay and become a master of the blade with this comprehensive guide to the Samurai job, optimized for SEO and tailored for the latest expansion, Endwalker.
Unleashing Devastating Strikes
The Samurai is a force to be reckoned with, dealing unparalleled damage that leaves enemies trembling in fear. With their katana as their trusted companion, Samurai warriors share Striking gear with Monks, emphasizing Strength as their main attribute. Unlike other jobs, Samurai doesn't offer raid buffs or party utility. Instead, it excels at capitalizing on the buffs provided by their fellow party members, maximizing the potency of each burst window.
Mastering the Burst Window
Every 120 seconds, the Samurai taps into their inner strength and unleashes a torrent of heavy-hitting abilities. This burst window is where the true artistry of the Samurai shines, as they unleash devastating combos and unleash their full potential. Additionally, a slightly lower burst can be achieved every 60 seconds. Timing and precision are crucial during these windows, as they primarily rely on GCD-based setups, making it challenging to adjust on the fly. The key to optimizing your Samurai lies in extending, shortening, or rearranging your rotation based on the unique demands of each encounter, such as mechanics or boss phases. This flexibility allows you to adapt and continue capitalizing on your party's raid buffs, showcasing your expertise and elevating your performance to new heights.
Rotating through the Dance of the Blade
At the heart of the Samurai's gameplay lies a delicate dance of three fundamental combos. These combos uphold crucial buffs and generate valuable resources known as Sen and Kenki. The seamless execution of these combos not only keeps your damage output at its peak but also ensures a steady accumulation of Sen and Kenki for your devastating bursts. Mastery of these combos is the foundation upon which your Samurai prowess is built, enabling you to weave together a symphony of precision strikes.
The Balance of Entry and Skill
The Samurai job offers a relatively low barrier to entry, allowing newcomers to dive into the world of Eorzea with ease. However, beneath the surface lies a vast skill ceiling that challenges even the most seasoned warriors. True mastery of the Samurai job lies in understanding the intricacies of rearranging your rotation to adapt to different fights and mechanics while maximizing the benefits of your party's raid buffs. Each encounter presents an opportunity to showcase your adaptability and strategic thinking, raising the bar for your performance and ensuring you stand out among the ranks of Samurai warriors.
Prepare for Endwalker: Unleash Your Inner Samurai
As Final Fantasy XIV continues to evolve, the Endwalker expansion brings forth new horizons for the Samurai job. Stay at the forefront of the ever-changing landscape by honing your skills and adapting to the latest updates. Embrace the forthcoming challenges and embark on an unforgettable journey where the way of the blade reigns supreme.
Claim Your Destiny as a Samurai
The path of the Samurai beckons, where the clash of steel and the pursuit of perfection intertwine. Equip your katana, channel your focus, and immerse yourself in the realm of Final Fantasy XIV as a legendary Samurai. Harness your inner warrior, seize every opportunity to optimize your bursts, and leave a trail of destruction in your wake. The realm awaits your arrival, aspiring Samurai. Rise to the challenge, and let the echoes of your strikes reverberate throughout Eorzea!
Unleashing the Samurai's Strengths and Addressing Their Weaknesses in Final Fantasy XIV
When it comes to the Samurai job in Final Fantasy XIV, understanding its strengths and weaknesses is key to mastering this formidable melee powerhouse. In this detailed guide, we will delve into the intricacies of the Samurai's gameplay, highlighting their unique advantages while shedding light on the challenges they face. Whether you're a seasoned veteran or a novice seeking to embark on the path of the Samurai, this comprehensive SEO-optimized guide will equip you with the knowledge to maximize your potential in Endwalker and beyond.
Embracing the Way of the Samurai: Strengths Unveiled
The Samurai job boasts a remarkable balance between accessibility and complexity, making it appealing to newcomers and seasoned players alike. With a low skill floor and a high skill ceiling, aspiring Samurai warriors can swiftly enter the fray while still having ample room for growth and mastery. As you progress, the Samurai reveals its true potential, allowing you to showcase your prowess and ascend to the ranks of the elite.
One of the Samurai's defining strengths lies in their devastating 2-minute burst windows. During these intense periods, their abilities reach new heights, unleashing a flurry of destructive attacks that can turn the tide of battle. These powerful bursts provide an opportunity to showcase your precision and timing, making you a formidable force on the battlefield.
Furthermore, the Samurai offers a diverse array of options when it comes to resource expenditure. The accumulation and management of Sen and Kenki grant you flexibility in combat, empowering you to adapt your approach to suit each situation. This versatility allows you to tailor your gameplay to maximize your damage output and exploit your enemies' weaknesses.
In terms of mobility, the Samurai shines brightly. With access to Hissatsu: Yaten and Hissatsu: Gyoten, their high mobility abilities, they can swiftly traverse the battlefield, closing in on foes or evading dangerous encounters. This agility not only enhances your survivability but also enables you to maintain consistent pressure on your adversaries.
Overcoming the Obstacles: Addressing the Samurai's Weaknesses
Despite their many strengths, the Samurai job also faces some inherent weaknesses that demand attention. Foremost, the Samurai offers no party utility beyond damage. Their contribution to the group hinges solely on the player's skill in dealing devastating blows. While this places a heavy burden on your individual performance, it also offers an opportunity to showcase your dedication and prowess as a self-sufficient warrior.
The Samurai's burst windows require careful preparation, making deaths or extended downtime particularly challenging to recover from. Timely execution and staying alive throughout encounters are essential to maintaining your momentum and ensuring you unleash your full potential.
It is worth noting that the Samurai's versatility and variety of abilities come at the cost of a potentially bloated hotbar. Managing numerous separate abilities can pose a challenge, requiring meticulous organization and a deep understanding of each skill's purpose. Through strategic planning and practice, however, you can overcome this obstacle and streamline your gameplay experience.
Embrace the Samurai's Potential: Rise to Greatness
As you venture into the vast realm of Final Fantasy XIV, the Samurai job awaits your arrival, offering unparalleled strength and the thrill of the blade. Armed with the knowledge of the Samurai's strengths and weaknesses, you can now embark on your journey with confidence and purpose. Continuously refine your skills, adapt to new challenges, and seize every opportunity to unleash devastating attacks upon your foes.
Endwalker heralds a new era for the Samurai, brimming with fresh content and exciting updates. Stay informed, remain agile, and adapt to the ever-changing landscape of the game. The realm beckons you, aspiring Samurai, to carve your name into the annals of Final Fantasy XIV history. Embrace the path of the warrior, overcome adversity, and let the echoes of your strikes resonate throughout Eorzea!
Remember, the way of the Samurai demands discipline, resilience, and unwavering determination. Embrace these qualities, and may the realm bear witness to your unrivaled might!
Mastering the Samurai Gauges: Unleashing the Power Within
In the realm of Final Fantasy XIV, the Samurai job stands as a symbol of precision and mastery in combat. To fully embrace the art of the Samurai, one must understand the intricacies of their unique gauges. In this extensive and SEO-optimized guide, we will delve into the depths of the Samurai's gauges, unlocking their secrets and empowering you to reach new heights as a warrior of the blade in Endwalker and beyond.
The Sen Gauge: Harnessing the Essence of Combat
At the heart of the Samurai's gauges lies the Sen Gauge, a visual representation of the accumulated Sen. Sen is acquired through various combos, each associated with a different aspect of combat. Setsu, represented at the top of the Sen Gauge, is gained through executing Yukikaze. Getsu, found on the left side, can be obtained by using Gekko or Mangetsu. Lastly, Ka, situated on the right side, is earned by performing Kasha or Oka.
The accumulated Sen within the gauge serves as a valuable resource, fueling the Samurai's ultimate technique known as Iaijutsu. When executing Iaijutsu, the combination of Sen becomes crucial, rather than the specific sequence. Regardless of the Sen combination, the number of Sen accumulated determines the attack unleashed. With one Sen, Higanbana, a potent damage-over-time ability with a duration of 60 seconds, is unleashed. At two Sen, the devastating frontal cone area-of-effect skill Tenka Goken wreaks havoc upon enemies. Finally, with three Sen, the awe-inspiring Midare Setsugekka, a single-target nuke of immense power, is unleashed upon your chosen foe.
The Kenki Gauge: Unleashing Controlled Fury
Unlocking its potential at Level 52 through the Kenki Mastery trait, the Kenki Gauge is a vital aspect of the Samurai's arsenal. Initially, Kenki is obtained only through combo finishers or a successful use of Third Eye. However, as you progress and reach Level 62, the Kenki Mastery II trait expands the methods of Kenki acquisition to include all of the Samurai's Weaponskills, except Iaijutsu.
Kenki serves as a resource for unleashing powerful oGCD (off-global cooldown) abilities known as Hissatsu. These abilities offer a mix of increased mobility and potent damage output. From Hissatsu: Gyoten, enhancing your mobility, to Hissatsu: Shinten, amplifying your raw damage, and Hissatsu: Senei, augmenting your survivability, each Hissatsu ability empowers your Samurai's toolkit, allowing you to adapt to various combat scenarios.
The Meditation Gauge: Attaining Spiritual Focus
At Level 70, the Samurai gains access to the Meditation Gauge upon unlocking the Shoha ability. Stacks of Meditation are acquired through the use of Iaijutsu, Meditate, and Ogi Namikiri, reaching a maximum of three stacks. Once the Meditation Gauge is full, you can choose to expend all three stacks on either Shoha, a formidable single-target oGCD skill, or Shoha II, an area-of-effect ability designed to unleash devastation upon multiple foes.
By skillfully managing the Meditation Gauge, you can harness the concentrated power within, strategically deciding when to employ these potent skills for maximum impact. With the essence of meditation, your Samurai can strike fear into the hearts of enemies and leave a trail of destruction in your wake.
Unleash the True Potential of the Samurai
Armed with a deep understanding of the Samurai's gauges, you are now poised to unlock the true potential of this distinguished job. Master the art of accumulating and expending Sen, harness the fury of Kenki to devastating effect, and achieve spiritual focus through the Meditation Gauge. As you journey through the ever-evolving realm of Final Fantasy XIV, embrace the way of the Samurai and let your blade sing with power and precision.
Endwalker heralds a new chapter for the Samurai, filled with fresh challenges and exciting updates. Stay informed, adapt to the changing landscape of the game, and continuously refine your skills. The path of the Samurai demands discipline, focus, and unwavering dedication. Embrace these principles, and let your strikes resonate throughout Eorzea as a legendary warrior of the blade.
The time has come to seize your destiny, aspiring Samurai. Embrace the gauges, unleash your inner power, and let the echoes of your blade reverberate throughout the realm of Final Fantasy XIV!
Samurai Actions
| Action Name |
|
|
Effect |
|---|---|---|---|
| Hakaze Lv. 1 |
|
|
Delivers an attack with a potency of 200.Additional Effect: Increases Kenki Gauge by 5 |
| Jinpu Lv. 4 |
|
|
Delivers an attack with a potency of 120.Combo Action: HakazeCombo Potency: 280Combo Bonus: Grants FugetsuFugetsu Effect: Increases damage dealt by 13%Duration: 40sCombo Bonus: Increases Kenki Gauge by 5 |
| Third Eye Lv. 6 |
|
|
Reduces the amount of damage taken by the next attack by 10%.Duration: 4sAdditional Effect: Increases Kenki Gauge by 10 when hit |
| Enpi Lv. 15 |
|
|
Delivers a ranged attack with a potency of 100.Enhanced Enpi Bonus Potency: 260Additional Effect: Increases Kenki Gauge by 10 |
| Shifu Lv. 18 |
|
|
Delivers an attack with a potency of 120.Combo Action: HakazeCombo Potency: 280Combo Bonus: Grants FukaFuka Effect: Reduces weaponskill cast time and recast time, spell cast time and recast time, and auto-attack delay by 13%Duration: 40sCombo Bonus: Increases Kenki Gauge by 5 |
| Fuga Lv. 26 |
|
|
Delivers an attack with a potency of 90 to all enemies in a cone before you.Additional Effect: Increases Kenki Gauge by 5 |
| Gekko Lv. 30 |
|
|
Delivers an attack with a potency of 120.170 when executed from a target's rear.Combo Action: JinpuCombo Potency: 330Rear Combo Potency: 380Combo Bonus: Increases Kenki Gauge by 10Combo Bonus: Grants Getsu |
| Higanbana Lv. 30 |
|
|
Delivers an attack with a potency of 200.Additional Effect: Damage over timePotency: 45Duration: 60sAdditional Effect: Grants a stack of Meditation, up to a maximum of 3※This action cannot be assigned to a hotbar. |
| Iaijutsu Lv. 30 |
|
|
Executes a weaponskill depending on current number of Sen stored in Sen Gauge.1 Sen: Higanbana2 Sen: Tenka Goken3 Sen: Midare Setsugekka |
| Mangetsu Lv. 35 |
|
|
Delivers an attack with a potency of 100 to all nearby enemies.Combo Action: FukoCombo Potency: 120Combo Bonus: Grants FugetsuFugetsu Effect: Increases damage dealt by 13%Duration: 40sCombo Bonus: Increases Kenki Gauge by 10Combo Bonus: Grants Getsu |
| Kasha Lv. 40 |
|
|
Delivers an attack with a potency of 120.170 when executed from a target's flank.Combo Action: ShifuCombo Potency: 330Flank Combo Potency: 380Combo Bonus: Increases Kenki Gauge by 10Combo Bonus: Grants Ka |
| Tenka Goken Lv. 40 |
|
|
Delivers an attack with a potency of 300 to all nearby enemies.Additional Effect: Grants a stack of Meditation, up to a maximum of 3※This action cannot be assigned to a hotbar. |
| Oka Lv. 45 |
|
|
Delivers an attack with a potency of 100 to all nearby enemies.Combo Action: FukoCombo Potency: 120Combo Bonus: Grants FukaFuka Effect: Reduces weaponskill cast time and recast time, spell cast time and recast time, and auto-attack delay by 13%Duration: 40sCombo Bonus: Increases Kenki Gauge by 10Combo Bonus: Grants Ka |
| Meikyo Shisui Lv. 50 |
|
|
Execute up to 3 weaponskill combos without meeting combo prerequisites. Does not affect Iaijutsu or Ogi Namikiri.Duration: 15sAdditional Effect: Successfully landing Gekko grants Fugetsu, and successfully landing Kasha grants FukaMaximum Charges: 2 |
| Midare Setsugekka Lv. 50 |
|
|
Delivers a critical hit with a potency of 640.Damage dealt is increased when under an effect that raises critical hit rate.Additional Effect: Grants a stack of Meditation, up to a maximum of 3※This action cannot be assigned to a hotbar. |
| Yukikaze Lv. 50 |
|
|
Delivers an attack with a potency of 120.Combo Action: HakazeCombo Potency: 300Combo Bonus: Increases Kenki Gauge by 15Combo Bonus: Grants Setsu |
| Hissatsu: Shinten Lv. 52 |
|
|
Delivers an attack with a potency of 250.Kenki Gauge Cost: 25 |
| Hissatsu: Gyoten Lv. 54 |
|
|
Rushes target and delivers an attack with a potency of 100.Kenki Gauge Cost: 10Cannot be executed while bound. |
| Hissatsu: Yaten Lv. 56 |
|
|
Delivers an attack with a potency of 100.Additional Effect: 10-yalm backstepAdditional Effect: Grants Enhanced EnpiDuration: 15sKenki Gauge Cost: 10Cannot be executed while bound. |
| Meditate Lv. 60 |
|
|
Gradually increases your Kenki Gauge.Duration: 15sAdditional Effect: Grants stacks of Meditation when used in combat, up to a maximum of 3Kenki Gauge not affected when used outside battle.Effect ends upon using another action or moving (including facing a different direction).Cancels auto-attack upon execution.Triggers the cooldown of weaponskills upon execution. Cannot be executed during the cooldown of weaponskills. |
| Hissatsu: Kyuten Lv. 62 |
|
|
Delivers an attack with a potency of 120 to all nearby enemies.Kenki Gauge Cost: 25 |
| Hagakure Lv. 68 |
|
|
Converts Setsu, Getsu, and Ka into Kenki. Each Sen converted increases your Kenki Gauge by 10. Can only be executed if under the effect of at least one of the three statuses. |
| Ikishoten Lv. 68 |
|
|
Increases Kenki Gauge by 50.Additional Effect: Grants Ogi Namikiri ReadyDuration: 30sCan only be executed while in combat. |
| Hissatsu: Guren Lv. 70 |
|
|
Delivers an attack to all enemies in a straight line before you with a potency of 500 for the first enemy, and 25% less for all remaining enemies.Kenki Gauge Cost: 25Shares a recast timer with Hissatsu: Senei. |
| Hissatsu: Senei Lv. 72 |
|
|
Delivers an attack with a potency of 860.Kenki Gauge Cost: 25Shares a recast timer with Hissatsu: Guren. |
| Kaeshi: Goken Lv. 76 |
|
|
Delivers an attack with a potency of 300 to all nearby enemies.Triggers the cooldown of weaponskills upon execution. Cannot be executed during the cooldown of weaponskills.※This action cannot be assigned to a hotbar. |
| Kaeshi: Higanbana Lv. 76 |
|
|
Delivers an attack with a potency of 200.Additional Effect: Damage over timePotency: 45Duration: 60sEffect cannot be stacked with Higanbana.Triggers the cooldown of weaponskills upon execution. Cannot be executed during the cooldown of weaponskills.※This action cannot be assigned to a hotbar. |
| Kaeshi: Setsugekka Lv. 76 |
|
|
Delivers a critical hit with a potency of 640.Damage dealt is increased when under an effect that raises critical hit rate.Triggers the cooldown of weaponskills upon execution. Cannot be executed during the cooldown of weaponskills.※This action cannot be assigned to a hotbar. |
| Tsubame-gaeshi Lv. 76 |
|
|
Repeats the previously executed iaijutsu.Maximum Charges: 2Can only be executed immediately following Iaijutsu.Triggers the cooldown of weaponskills upon execution. Cannot be executed during the cooldown of weaponskills. |
| Shoha Lv. 80 |
|
|
Delivers an attack with a potency of 560.Can only be executed after accumulating three stacks of Meditation by executing Iaijutsu, Meditate, or Ogi Namikiri while in combat.Meditation effect fades upon execution.Shares a recast timer with Shoha II. |
| Shoha II Lv. 82 |
|
|
Delivers an attack with a potency of 200 to all nearby enemies.Can only be executed after accumulating three stacks of Meditation by executing Iaijutsu, Meditate, or Ogi Namikiri while in combat.Meditation effect fades upon execution.Shares a recast timer with Shoha. |
| Fuko Lv. 86 |
|
|
Delivers an attack with a potency of 100 to all nearby enemies.Additional Effect: Increases Kenki Gauge by 10 |
| Kaeshi: Namikiri Lv. 90 |
|
|
Delivers a critical hit to all enemies in a cone before you with a potency of 860 for the first enemy, and 75% less for all remaining enemies.Damage dealt is increased when under an effect that raises critical hit rate.Triggers the cooldown of weaponskills upon execution. Cannot be executed during the cooldown of weaponskills.※This action cannot be assigned to a hotbar. |
| Ogi Namikiri Lv. 90 |
|
|
Delivers a critical hit to all enemies in a cone before you with a potency of 860 for the first enemy, and 75% less for all remaining enemies.Damage dealt is increased when under an effect that raises critical hit rate.Grants a stack of Meditation, up to a maximum of 3.Can only be executed while under the effect of Ogi Namikiri Ready.※Action changes to Kaeshi: Namikiri upon execution. |
Role Actions
| Action Name |
|
|
Effect |
|---|---|---|---|
| Second Wind Lv. 8 |
|
|
Instantly restores own HP.Cure Potency: 500 |
| Leg Sweep Lv. 10 |
|
|
Stuns target.Duration: 3s |
| Bloodbath Lv. 12 |
|
|
Converts a portion of physical damage dealt into HP.Duration: 20s |
| Feint Lv. 22 |
|
|
Lowers target's physical damage dealt by 10% and magic damage dealt by 5%.Duration: 10s |
| Arm's Length Lv. 32 |
|
|
Creates a barrier nullifying most knockback and draw-in effects.Duration: 6sAdditional Effect: Slow +20% when barrier is struckDuration: 15s |
| True North Lv. 50 |
|
|
Nullifies all action direction requirements.Duration: 10sMaximum Charges: 2 |
Samurai Traits
| Action Name | Acquired | Effect |
|---|---|---|
| Kenki Mastery | Lv. 52 |
Increases Kenki Gauge when landing select weaponskills or when taking damage while under the effect of Third Eye. |
| Kenki Mastery II | Lv. 62 |
Increases Kenki Gauge when landing all weaponskills excluding Iaijutsu. |
| Way of the Samurai | Lv. 66 |
Increases the potency of Hakaze to 200, Jinpu to 120, and Shifu to 120. |
| Enhanced Iaijutsu | Lv. 74 |
Reduces Iaijutsu cast time to 1.3 seconds. |
| Enhanced Fugetsu and Fuka | Lv. 78 |
Improves Fugetsu's damage increase to 13% and Fuka's reduction to weaponskill cast time and recast time, spell cast time and recast time, and auto-attack delay to 13%. |
| Enhanced Tsubame-gaeshi | Lv. 84 |
Allows the accumulation of charges for consecutive uses of Tsubame-gaeshi. Maximum Charges: 2 |
| Way of the Samurai II | Lv. 84 |
Increases the potency of Gekko, Kasha, and Yukikaze to 120. |
| Fuga Mastery | Lv. 86 |
Upgrades Fuga to Fuko. |
| Enhanced Meikyo Shisui | Lv. 88 |
Allows the accumulation of charges for consecutive uses of Meikyo Shisui. Maximum Charges: 2 |
| Enhanced Ikishoten | Lv. 90 |
Grants Ogi Namikiri Ready upon execution of Ikishoten. Duration: 30s |
Unleashing the Perfect Dance: A Comprehensive Samurai Rotation Overview
In the realm of Final Fantasy XIV, the art of the Samurai extends far beyond mere swordplay. As a master of the blade, it is crucial to understand the intricacies of the Samurai rotation. In this detailed and SEO-optimized guide, we will delve into the mechanics of the Samurai rotation at level 90, offering you a comprehensive overview of this complex dance of death. Prepare to immerse yourself in the world of alternating bursts, strategic cooldown management, and filling the gaps with precision to maximize your damage output.
The Loop of Power: Understanding the Samurai Rotation
At its core, the single-target Samurai rotation operates as a loop, designed to maintain a consistent flow of devastating attacks. This loop consists of several distinct phases: the opener, the cooldown phase, filler actions, and the bursts corresponding to odd and even minutes. Understanding the intricacies of each phase is essential to optimizing your damage output and attaining true mastery as a Samurai.
The Opener: Setting the Stage for Carnage
The opener is a crucial part of the Samurai rotation, serving as the foundation for the subsequent phases. It involves a carefully choreographed sequence of abilities that maximize your damage potential right from the start of the encounter. Executing your opener flawlessly sets the stage for the rest of your rotation, laying the groundwork for the burst phases that follow.
The Cooldown Phase: Timing is Everything
After the initial burst of the opener, the cooldown phase begins. This phase revolves around patiently waiting for your powerful cooldown abilities to become available again. As a Samurai, strategic cooldown management is key to maximizing your burst potential. This phase requires careful timing and awareness, ensuring that your high-impact abilities are ready for deployment when the time is right.
Filler Actions: Filling the Gaps with Efficiency
During downtime or when waiting for cooldowns, you may find yourself in need of filler actions. These actions serve two purposes: keeping your global cooldown active and preventing wasted resources. It's crucial to select filler actions that allow you to maintain a steady flow of damage while conserving resources for your bursts. Each filler action should be chosen strategically to avoid disrupting the overall rhythm of your rotation.
Odd and Even Bursts: Unleashing Devastation on Schedule
The pinnacle of the Samurai rotation lies in the bursts that occur during odd and even minutes. These bursts are the culmination of precise timing and resource management, allowing you to unleash an onslaught of devastating attacks. During odd minutes, you execute a burst sequence specifically tailored to maximize damage output during those intervals. Similarly, even minutes call for a distinct burst sequence, optimized for efficient resource utilization and immense burst potential.
Optimizing Your Samurai Rotation: Striving for Perfection
To truly master the Samurai rotation, continual optimization is essential. As you become more proficient, you will uncover opportunities to fine-tune your rotation based on encounter mechanics, fight duration, and party compositions. Each battle presents a unique set of challenges, requiring adaptability and flexibility in your rotation to maximize efficiency and exploit enemy vulnerabilities.
Stay Ahead of the Curve: Embrace the Samurai's Fluidity
As the realm of Final Fantasy XIV continues to evolve with new updates and expansions, the Samurai rotation also undergoes adjustments and refinements. By staying informed and adapting your playstyle accordingly, you can ensure that you are always at the forefront of the ever-changing landscape. Embrace the fluidity of the Samurai's rotation, honing your skills, and pushing the limits of your damage potential.
Embrace the Way of the Samurai: Unleash Your Inner Warrior
Armed with a comprehensive understanding of the Samurai rotation, you are ready to step onto the battlefield and carve your path as a legendary warrior. Immerse yourself in the dance of death, perfecting the intricacies of each phase, and let your blade sing with power and precision. Strive for perfection, adapt to the challenges that lie ahead, and let your name be forever etched in the annals of Final Fantasy XIV history.
The journey of the Samurai is one of discipline, resilience, and unwavering dedication. Embrace these principles, unlock the full potential of the Samurai rotation, and let your strikes resound throughout Eorzea, inspiring awe and fear in your enemies.
Now, draw your katana, step forward, and claim your destiny as a master of the Samurai rotation in Final Fantasy XIV!
Extreme Trials & Mount Boost
Welcome to Simple Carry's FFXIV Mount Carry Service, where our mission is to provide an exceptional gaming experience by offering expert boosters who are committed to delivering the most sought-after mounts in the game. With our team of professionals, you can expect a top-notch service that takes the hard work out of acquiring these exclusive mounts.
We understand that time is valuable, and the process of farming for mounts in FFXIV can be challenging and time-consuming. That's why we've designed our Mount Carry Service to cater to players who are seeking to save time and obtain the most coveted mounts in the game. Our team of experts is dedicated to providing you with a seamless experience, so you can sit back, relax, and let us handle the hard work for you.
With Simple Carry, you can trust that our boosters have the necessary knowledge, skills, and expertise to efficiently acquire the mounts you desire. We prioritize delivering the highest quality of service, ensuring that your experience with us is smooth and enjoyable. By utilizing our Mount Carry Service, you can bypass the time-consuming grind and gain access to the most exclusive mounts FFXIV has to offer.
So, why waste countless hours farming for mounts when you can rely on Simple Carry? Our service is designed to meet your needs and provide you with a hassle-free solution to obtaining the most sought-after mounts in FFXIV. Sit back, relax, and let our team of professionals take care of the hard work while you enjoy the excitement of riding your new mounts.
Unleashing the Perfect Storm: Mastering the Samurai Opener
In the realm of Final Fantasy XIV, the Samurai job excels at delivering devastating bursts of damage. One of the key aspects of maximizing your damage potential as a Samurai lies in executing a well-optimized opener. In this comprehensive and SEO-optimized guide, we will delve into the intricacies of the Samurai opener, providing you with the knowledge and strategies to unleash a flurry of high-potency attacks and leave your enemies in awe.
Harnessing the Power of Meikyo Shisui
The Samurai's opener revolves around the potent ability known as Meikyo Shisui. This skill allows you to gain buffs from combo finishers, granting you a significant advantage right from the start. By utilizing a pre-pull Meikyo Shisui, you can swiftly activate your buffs, maximizing their uptime and ensuring you begin the encounter with enhanced damage potential. This opener is specifically designed to unleash a relentless barrage of attacks, taking full advantage of your potion and the raid buffs provided by your party.
Customizing the Opener to Suit Your Playstyle
While there is a standard opener for Samurai, it is essential to adapt and tailor it to your individual playstyle and proficiency with certain techniques. For example, if you struggle with double weaving or encounter difficulty weaving after certain Iaijutsu casts like Midare Setsugekka, you have the flexibility to adjust the placement of certain oGCDs, such as Hissatsu: Senei and Shoha, as long as they still align with party buffs. In certain encounters, this may also allow for more opportunities to double weave Third Eye. Adapting your opener based on the boss' phasing can also be advantageous. For instance, swapping the use of Kasha and Gekko based on positional requirements can optimize your damage output. However, it is important to maintain awareness of your Sen accumulation to avoid overcapping.
The Samurai Opener: Unleashing the Storm
To guide you on your path to mastery, here is a sample rotation for a Samurai opener at level 90:
- Activate Meikyo Shisui when there are 9 seconds left on the countdown.
- Use True North when there are 5 seconds left on the countdown.
- Execute the following sequence:
- Gekko, followed by consuming a Grade 6 Tincture of Strength.
- Kasha, immediately followed by Ikishoten.
- Yukikaze.
- Midare Setsugekka, followed by Hissatsu: Senei.
- Kaeshi: Setsugekka, immediately followed by Meikyo Shisui.
- Gekko, followed by Hissatsu: Shinten.
- Apply Higanbana.
- Execute Kasha, followed by Hissatsu: Shinten.
- Perform Ogi Namikiri, followed by Shoha.
- Execute Kaeshi: Namikiri, followed by Hissatsu: Shinten.
- Follow up with Gekko, and unleash Hissatsu: Gyoten.
- Continue the rotation with Hakaze, Yukikaze, Hissatsu: Shinten, Midare Setsugekka, and Kaeshi: Setsugekka.
- Both Meikyo Shisui and True North can be used closer to the pull without any significant detriment. These early timers are included to maximize potential uses during the fight. Depending on the fight's duration and mechanics, their placement may not make a substantial difference.
Adapting and Evolving: The Essence of a Samurai
Remember, the Samurai opener serves as a foundation for your performance, but true mastery comes from adapting and evolving your rotation based on encounter-specific requirements. Continuously analyze your performance, fine-tune your opener, and experiment with different approaches to maximize your damage potential. Remain adaptable and open to change, adjusting your opener to suit the unique demands of each battle.
Step onto the Battlefield: Unleash the Storm
Armed with the knowledge of the Samurai opener, you are now prepared to embark on a journey of precision and devastation. Embrace the power of Meikyo Shisui, customize your opener to suit your playstyle, and deliver a relentless storm of high-potency attacks upon your enemies. As you progress through the ever-evolving world of Final Fantasy XIV, adapt your opener to each encounter, overcome challenges, and carve your path as a legendary Samurai.
Now, draw your katana, step forward with unwavering determination, and let the fury of your opener resound throughout Eorzea. Claim your destiny as a master of the Samurai opener in Final Fantasy XIV!
Maintaining Momentum: The Cooldown Phase of the Samurai Rotation
As a Samurai in Final Fantasy XIV, mastering the ebb and flow of combat is essential to achieving optimal damage output. In this detailed and SEO-optimized guide, we will explore the Cooldown Phase of the Samurai rotation, where strategic resource management and maintaining a steady rotation are key. Prepare to unleash your inner warrior as we delve into the intricacies of this phase, ensuring your sword never falters and your enemies tremble in your wake.
Navigating the Cooldown Phase: A Moment of Reprieve
During the Cooldown Phase, you will find yourself in a brief respite as your powerful burst abilities are on cooldown. This phase is characterized by rotating through your combos until your burst abilities become available once again. In a full uptime scenario, this phase typically consists of two full sets of three Sen rotations.
Resource Management: Kenki and Meditation
While the Kenki and Meditation spenders are not explicitly listed in this phase, it is crucial to keep an eye on your gauges and spend resources efficiently. Kenki should be used primarily on Hissatsu: Shinten and Shoha, preventing resource overcap and ensuring consistent damage output. Likewise, be mindful of your Meditation stacks and spend them wisely on Shoha or Shoha II to maximize your AoE potential or deal devastating single-target damage when the opportunity arises. Striking a balance between resource expenditure and preservation is key to maintaining momentum and optimizing your overall performance.
Flexibility within the Rotation
The Cooldown Phase offers a certain level of flexibility, allowing you to adjust your combos as long as you do not overcap Sen or let your buffs drop. It is recommended to conclude the second set of rotations with either a Gekko or Kasha combo to take advantage of any early buffs that may be available. This strategic positioning ensures that you make the most of your enhanced damage potential.
A Dance of Precision: The Cooldown Phase Rotation
To guide you on your journey, here is a sample rotation for the Cooldown Phase of the Samurai:
- Hakaze
- Yukikaze
- Hakaze
- Jinpu
- Gekko
- Hakaze
- Shifu
- Kasha
- Midare Setsugekka
- Hakaze
- Yukikaze
- Hakaze
- Jinpu
- Gekko
- Hakaze
- Shifu
- Kasha
Remember, this rotation should be repeated for the duration of the Cooldown Phase, ensuring a steady stream of damage while awaiting the return of your burst abilities. Stay focused, maintain your momentum, and unleash your strikes with precision and purpose.
Strive for Perfection: Optimization and Adaptability
While the Cooldown Phase provides a foundation for maintaining a consistent rotation, true mastery lies in optimization and adaptability. As you progress through encounters, remain mindful of fight mechanics, party composition, and buff durations. Adjusting your rotation to capitalize on these factors can significantly enhance your performance and elevate you to new heights as a Samurai warrior.
Embrace the Samurai Spirit: Carve Your Path
Armed with the knowledge of the Cooldown Phase, you possess the tools to unleash a relentless storm of attacks upon your foes. Embrace the spirit of the Samurai, honing your skills, and perfecting your rotation. Strive for perfection, adapt to the challenges that lie ahead, and let your blade become an extension of your very being.
Now, draw your katana, step onto the battlefield, and let the rhythm of the Cooldown Phase guide your strikes. The realm of Final Fantasy XIV awaits your arrival. Embrace the way of the Samurai, seize your destiny, and leave a legacy that echoes throughout Eorzea!
The Essential Filler: Maximizing Efficiency in the Samurai Rotation
In the world of Final Fantasy XIV, the Samurai job demands precision and adaptability in battle. As you navigate through the various phases of the rotation, the filler phase plays a vital role in maintaining the flow of combat and capitalizing on your party's raid buffs. In this extensive and SEO-optimized guide, we will explore the intricacies of the filler phase, ensuring that you make the most efficient use of your abilities, align your burst phases correctly, and seize every opportunity to unleash devastating attacks.
The Variable Nature of Filler: Adjusting to Different Factors
The filler phase of the Samurai rotation is not a fixed sequence but rather a flexible component that adapts based on several factors. These factors include the chosen GCD tier, whether the preceding burst was an odd or even minute burst, and any fight mechanics that may cause temporary downtime or necessitate moving away from the boss.
Understanding GCD Tiers: A Framework for Filler
To provide a foundation for your filler phase, it is crucial to comprehend the different GCD tiers and their impact on the rotation. Here are the three standard looping GCD tiers:
- 2.14 GCD (576-648 Skill Speed): This tier consists of a 28-GCD per minute looping rotation, requiring 2 filler GCDs during odd minutes and 0 filler GCDs during even minutes.
- 2.07 GCD (1044-1116 Skill Speed): This tier involves a 29-GCD per minute looping rotation, necessitating 3 filler GCDs during odd minutes and 1 filler GCD during even minutes.
- 2.00 GCD (1511-1583 Skill Speed): This tier utilizes a 30-GCD per minute looping rotation, calling for 4 filler GCDs during odd minutes and 2 filler GCDs during even minutes.
Additionally, there are three non-standard looping tiers that revolve around syncing with 120-second party buffs rather than the usual 60-second party buffs. However, it is important to note that these non-standard looping tiers are not recommended unless your Skill Speed is in an unconventional range due to specific gear choices. The tiers are as follows:
- 2.17 GCD (400-443 Skill Speed): This tier comprises a 27.5-GCD per minute looping rotation, requiring 1 filler GCD during odd minutes and 0 filler GCD during even minutes.
- 2.10 GCD (839-911 Skill Speed): This tier involves a 28.5-GCD per minute looping rotation, necessitating 3 filler GCDs during odd minutes and 0 filler GCD during even minutes.
- 2.03 GCD (1321-1379 Skill Speed): This tier utilizes a 29.5-GCD per minute looping rotation, calling for 3 filler GCDs during odd minutes and 2 filler GCDs during even minutes.
The Filler Options: Crafting Your Combination
Within the filler phase, you have the opportunity to choose between different combinations of filler actions, depending on the number of GCDs required. Here are the three filler options:
- One GCD: Hissatsu: Yaten followed by Enpi.
- Two GCDs: Hakaze followed by Yukikaze and then Hagakure.
- Three GCDs: Hakaze followed by either Shifu or Jinpu, then Kasha or Gekko, and finally Hagakure.
Optimizing Filler Usage: Accounting for Downtime and Mechanics
Throughout the course of a fight, you may encounter situations where you are forced to disconnect from the boss or experience periods of downtime due to mechanics. In such scenarios, it is essential to adjust your filler phase accordingly. Start by removing any missed GCDs from your filler phase, prioritizing the removal of GCDs that align with the mechanics or periods of disconnection. If you end up losing more GCDs than you have filler actions, one optimization strategy is to use Meikyo Shisui early, specifically at the end of the cooldown phase. By doing so, you can hit 3 Sen in time for your burst, effectively compensating for the missed GCDs. However, keep in mind that this adjustment will result in a slightly weaker burst, as you will need to manually build combos and expend your three Meikyo Shisui charges.
An example of this adjustment is as follows:
During the second half of the cooldown phase:
- Hakaze
- Yukikaze
- Hakaze
- Jinpu
- Gekko followed by Meikyo Shisui
- Kasha
By employing this strategy, you can offset the impact of missed GCDs, providing room for as many as six missed GCDs during odd minutes. However, keep in mind that this adjustment comes at the cost of a slightly weaker burst.
Adaptation and Mastery: The Essence of a Samurai
As a Samurai, adaptation and mastery are key to achieving greatness. The filler phase allows you to fine-tune your rotation, adapt to fight mechanics, and optimize your damage output. Remain observant and responsive to the ever-changing battle conditions, adjusting your filler phase to make the most of every opportunity.
Unleash the Power Within: A Samurai's Journey
Armed with the knowledge of the filler phase, you are now ready to embark on a journey of precision and devastation. Embrace the art of the Samurai, hone your skills, and perfect your rotation. Strive for perfection, adapt to the challenges that lie ahead, and let your blade become an extension of your very soul.
Now, draw your katana, step onto the battlefield, and let the flow of the filler phase guide your strikes. The realm of Final Fantasy XIV awaits your arrival. Embrace the way of the Samurai, seize your destiny, and leave a legacy that echoes throughout Eorzea!
Unleashing the Odd Minute Fury: Mastering the Samurai's Odd Minute Burst
As a Samurai in Final Fantasy XIV, your combat prowess reaches its zenith during the intense bursts of battle. The odd minute burst is a critical component of your rotation, delivering a flurry of devastating strikes. In this comprehensive and SEO-optimized guide, we will delve into the intricacies of the odd minute burst, equipping you with the knowledge and strategies to maximize your damage potential and leave your enemies in awe.
Understanding the Odd Minute Burst: A Moment of Frenzied Power
During the odd minute burst, you find yourself in a state where Ikishoten is still on cooldown, preventing the use of Ogi Namikiri. As a result, this burst phase is relatively shorter and does not pack the same punch as the even minute burst. However, by executing the correct sequence of abilities, you can still unleash a formidable assault on your adversaries. It is important to note that the bursts outlined below do not include specific Kenki and Meditation spenders. However, remember to wisely utilize your gauge on Hissatsu: Shinten and Shoha, ensuring efficient resource management and avoiding unnecessary overcap.
Seamless Transition: Flowing from the Cooldown Phase
The odd minute burst seamlessly follows the end of the cooldown phase, allowing for a continuous flow of devastating attacks. The burst commences with Midare Setsugekka, serving as the opening strike to herald the storm of destruction. The following sequence outlines the optimal order of abilities for the odd minute burst:
- Midare Setsugekka
- Kaeshi: Setsugekka followed by Meikyo Shisui
- Gekko
- Higanbana
- Gekko
- Kasha
- Hakaze
- Yukikaze
- Midare Setsugekka
Embrace the Fluidity of Combat: Unleash the Odd Minute Burst
Armed with the knowledge of the odd minute burst, it is now time to channel your inner warrior and unleash a relentless onslaught. As you engage in battle, execute each ability with precision, ensuring that your strikes hit their mark and leave your foes in disarray. Embrace the fluidity of combat, maintaining a steady rhythm and synchronizing your attacks for maximum effect.
Customize and Adapt: Fine-tuning Your Burst
While the odd minute burst follows a general sequence, it is essential to adapt and customize it based on the specific demands of each encounter. Analyze the fight mechanics, party composition, and buff durations, adjusting your burst accordingly. By fine-tuning your burst to align with these factors, you can optimize your damage output and elevate your performance to new heights.
The Path to Samurai Mastery: Your Journey Begins
Armed with the knowledge of the odd minute burst, you stand at the precipice of greatness. Embrace the art of the Samurai, refine your skills, and embark on a journey of mastery. Strive for perfection, adapt to the challenges that lie ahead, and let your blade become an extension of your very soul.
Now, draw your katana, unleash the fury of the odd minute burst, and carve your path as a legendary Samurai in the realm of Final Fantasy XIV. Eorzea awaits your presence, and the echoes of your strikes will resound throughout the ages!
Unleashing Unparalleled Might: Mastering the Samurai's Even Minute Burst
In the realm of Final Fantasy XIV, the Samurai stands as a paragon of devastation, harnessing the power of the katana to deliver blistering blows upon their foes. The even minute burst represents a pinnacle of destructive prowess, rivaling the intensity of the opener. In this comprehensive and SEO-optimized guide, we will explore the intricacies of the even minute burst, empowering you to unleash a symphony of devastation and leave a lasting mark on the battlefield.
A Mirror of the Opener: The Essence of the Even Minute Burst
The even minute burst closely mirrors the opener in its execution, with the exception of omitting the use of Meikyo Shisui to set up buffs and Sen. The utilization of Ikishoten is left to the player's discretion, as it depends on individual playstyles and preferences. Some may opt to stockpile Kenki for a late usage of Hissatsu: Shinten under raid buffs, while others may choose to forego the double weaves that this playstyle requires. It is important to manage Kenki effectively and avoid overcapping while ensuring timely usage of Ogi Namikiri.
Seizing the Moment: Unleashing the Even Minute Burst
Prepare to unleash unparalleled might as we outline the optimal sequence of abilities for the even minute burst:
- Midare Setsugekka
- Kaeshi: Setsugekka followed by Hissatsu: Senei and Meikyo Shisui
- Gekko
- Higanbana
- Gekko
- Ogi Namikiri
- Kaeshi: Namikiri
- Kasha
- Hakaze
- Yukikaze
- Midare Setsugekka
Crafting a Masterpiece: Customization and Optimization
While the even minute burst follows a prescribed sequence, it is crucial to adapt and optimize it to suit the demands of each encounter. Consider factors such as fight mechanics, party composition, and buff durations, and adjust your burst accordingly. By fine-tuning your rotation to align with these variables, you can maximize your damage output and leave a lasting impact on the battlefield.
Embracing the Rhythm: Creating a Seamless Rotation
As you progress through the battle, your rotation will flow between bursts and filler phases, creating a seamless symphony of devastating strikes. The recommended rotation structure is as follows:
Opener - Cooldown - Odd Burst - Filler - Cooldown - Even Burst - Filler - Cooldown - Odd Burst - and so on...
Maintaining the Rhythm: Account for GCD Drift
It is important to note that the first minute of the rotation consists of 29 GCDs due to the second charge of Kaeshi: Setsugekka. Most GCD tiers should not require any filler actions. However, with a 2.14 GCD rotation, you may experience a slight drift of one GCD. Extensive testing with rotation tools indicates that this drift does not result in a loss in overall effectiveness. Furthermore, this slight drift allows for one missed GCD without altering your rotation. While it may cause an early Higanbana reapplication, this minor adjustment ensures optimal performance and versatility.
Unleash Your Inner Samurai: Mastery Beckons
Armed with the knowledge of the even minute burst, you are prepared to embark on a journey of mastery. Embrace the spirit of the Samurai, hone your skills, and refine your rotation. Strive for perfection, adapt to the challenges that lie ahead, and let the echoes of your strikes resound throughout Eorzea.
Now, unsheathe your katana, harness the power of the even minute burst, and carve your path as a legendary Samurai. The realm of Final Fantasy XIV awaits your presence. Embrace the way of the warrior, seize your destiny, and leave an indelible mark on the annals of history!
Unleashing Destruction: Mastering Samurai Multi-Target Combat
As a Samurai in Final Fantasy XIV, your skills extend beyond single-target encounters. When faced with multiple adversaries, you must adapt your strategies to maximize your damage potential. In this comprehensive and SEO-optimized guide, we will explore the priorities and techniques of a Samurai in multi-target situations, ensuring that you unleash devastating attacks upon your foes and establish your dominance on the battlefield.
2.1. Two-Target Priority: Balancing Single Target and AoE Abilities
When engaging two targets, the Samurai employs a combination of single target and area-of-effect (AoE) skills to efficiently dispatch enemies. Here's the optimal approach for two-target encounters:
- Maintain your combos: Utilize your Yukikaze combo to keep your buffs up, and alternate between your Mangetsu and Oka combos to maintain the necessary buffs.
- Spend Sen: Direct your accumulated Sen towards the execution of Midare Setsugekka, ensuring that your powerful single-target strike hits its mark.
- Utilize Kenki: Spend your Kenki on Hissatsu: Guren and Hissatsu: Shinten to unleash additional damage on your targets.
- Harness Meditation: Employ Shoha, empowered by your Meditation stacks, to deal devastating blows to your adversaries.
- Meikyo Shisui Usage: When Meikyo Shisui is available, prioritize using charges on Gekko and Kasha to enhance your combo chains and maintain optimal damage output.
- Tsubame-gaeshi Execution: When Tsubame-gaeshi is ready for use, expend charges on Kaeshi: Setsugekka to deliver potent attacks and further decimate your enemies.
2.2. Three or More Target Priority: Unleashing the Full Power of AoE
When confronted with three or more targets, the Samurai fully embraces their AoE toolkit, ensuring widespread devastation. Follow these guidelines for efficient multi-target combat:
- Rotate between your Mangetsu and Oka combos to sustain your buffs and maintain optimal damage output.
- Spend Sen on Tenka Goken, a formidable area-of-effect ability that cleaves through your enemies.
- Harness Kenki by employing Hissatsu: Guren and Hissatsu: Kyuten, unleashing torrents of damage upon multiple targets.
- Utilize Meditation to charge Shoha II, a devastating AoE skill that wreaks havoc upon your adversaries.
- Optimize Meikyo Shisui usage by focusing charges on Mangetsu and Oka, enabling swift execution of your combo chains and maximizing your efficiency.
- Tsubame-gaeshi allows you to utilize Kaeshi: Goken, a potent AoE attack that can turn the tide of battle.
Adapting and Mastering: The Essence of the Samurai
As a Samurai, your ability to adapt and master different combat scenarios is crucial. Whether facing two targets or a horde of enemies, it is essential to align your skills and prioritize the most effective abilities. Remain attentive to fight mechanics, adjust your rotation accordingly, and unleash your skills with precision.
Achieving Mastery: Your Journey as a Samurai
Armed with the knowledge of multi-target combat as a Samurai, you are ready to embark on a path of mastery. Embrace the way of the warrior, refine your techniques, and become a force to be reckoned with on the battlefield. Strive for perfection, adapt to the challenges that await, and let your blade carve a legacy that echoes throughout Eorzea.
Now, draw your katana, heed the call of battle, and let the might of the Samurai surge through your veins. The realm of Final Fantasy XIV awaits your arrival. Embrace your destiny, conquer your foes, and etch your name in the annals of history!
Maximizing Your Samurai's Potential: A Guide to Stat Priority
As a Samurai in Final Fantasy XIV, your choice of stats can greatly impact your performance on the battlefield. In this comprehensive and SEO-optimized guide, we will delve into the intricacies of stat prioritization for the Samurai job, empowering you to make informed decisions that will enhance your damage output and optimize your gameplay.
- Weapon Damage and Strength: The Foundation of Power
At the core of the Samurai's stat priority lies the undeniable importance of Weapon Damage and Strength. Weapon Damage, as the name suggests, is exclusively tied to your weapon and stands as the most significant contributor to your overall damage potential. Strength, on the other hand, is a primary attribute found on all gear pieces and serves as the main stat for the Samurai job. When selecting gear, prioritize higher item levels to maximize both Weapon Damage and Strength, ensuring a solid foundation for your damage-dealing abilities.
- Skill Speed: Finding Your Ideal GCD Tier
The Samurai's rotation revolves around a repeating loop, and your choice of GCD (Global Cooldown) tier plays a vital role in optimizing your performance. The three primary GCD tiers for Samurai are as follows: 2.14 (576-648 Skill Speed), 2.07 (1044-1116 Skill Speed), and 2.00 (1511-1583 Skill Speed). To maintain alignment with your party's raid buffs and crucial abilities such as Higanbana and Kaeshi: Setsugekka, prioritize Skill Speed to match your desired GCD tier. Aim to stay closer to the lower end of each tier to maximize your efficiency and fluidity in combat.
- Critical Hit: Unleashing Devastating Strikes
Critical Hit is a substat that directly affects both critical hit chance and critical hit damage. Even during your burst phase, where you have multiple guaranteed critical hit abilities, Critical Hit remains a crucial substat that significantly impacts your damage output. Skills such as Kaeshi: Namikiri and Hissatsu: Senei, with their high potency, particularly benefit from a higher Critical Hit rating. Therefore, allocate resources to prioritize Critical Hit to unleash devastating strikes upon your adversaries.
- Determination and Direct Hit: Balancing Power
Determination and Direct Hit serve as additional substats that round out your stat priority. While both offer valuable benefits, Determination slightly edges out Direct Hit in terms of overall impact. Aim to keep both substats at similar levels, with Determination slightly higher, to strike a balance between raw power and accuracy.
- Customizing Your Stat Priority
It is important to note that your stat priority may not always align perfectly with a best-in-slot gear list due to the tiering of substats and the availability of stats on different gear pieces. For example, a lower Critical Hit rating may be observed in a particular gear setup, such as the 2.00 GCD BiS (Best-in-Slot). Consider these variations and evaluate the overall impact of substats on your performance when customizing your stat priority.
Embark on the Path of the Samurai: Mastering Your Destiny
Armed with the knowledge of stat priority, you are now equipped to forge your own destiny as a formidable Samurai. Experiment with gear selections, fine-tune your substat allocations, and adapt your approach based on encounters and playstyle preferences. Strive for perfection, optimize your rotation, and unleash your inner warrior upon the realm of Final Fantasy XIV.
Now, take up your katana, channel the power of your chosen stats, and let the might of the Samurai reign supreme. Eorzea awaits your presence. Embrace the path of the warrior, conquer your foes, and etch your name in the annals of history!
Enhancing Your Samurai's Arsenal: A Guide to Consumables
In the vast world of Final Fantasy XIV, Samurai warriors have access to a range of consumables that can amplify their prowess on the battlefield. In this extensive and SEO-optimized guide, we will explore the various consumables available to Samurai, enabling you to make informed choices that will bolster your damage-dealing capabilities and optimize your performance.
- Potions: Unleashing the Power Within
Potions, often referred to as tinctures, are a vital asset for any Samurai seeking to maximize their damage output. These elixirs come in different types and flavors, each offering unique benefits. As a Samurai, your focus should be on potions that enhance your Main Stat, which is Strength. Opt for High-Quality potions of the highest available grade, as they provide the greatest increase to your Strength attribute. These potions bestow their effects for a duration of 30 seconds and have a cooldown of 4 minutes and 30 seconds. By utilizing these potent concoctions, you can unleash your full potential and deal devastating blows to your adversaries.
- Food: Nourishment for Optimal Performance
The choice of food for a Samurai can be more nuanced, as it depends on your specific gear setup and progression. While working towards your best-in-slot gearset, the food you choose may vary. One crucial factor to consider is how the Samurai rotation interacts with Skill Speed. Depending on your current Skill Speed level, you may need to select food that provides Skill Speed if you are below your desired target. Conversely, if you have already reached or surpassed your Skill Speed target, you may opt for food that does not grant additional Skill Speed. This careful consideration ensures that you optimize your stat distribution and maintain a balanced approach to your gearing strategy.
Embrace the Culinary Delights: Unleashing Your Full Potential
As a discerning Samurai, the selection of consumables plays a significant role in your journey towards greatness. By choosing the right potions and food, you can harness the true power of your katana and rise above your adversaries. Experiment with different consumables, assess their impact on your playstyle, and adapt your choices based on your evolving gear progression. Strive for excellence, optimize your stat distribution, and let the synergistic effect of consumables elevate your performance on the battlefield.
Chart Your Course: Samurai's Path to Victory
Armed with the knowledge of consumables, you are now equipped to chart your path to victory as an indomitable Samurai. Seek out the finest potions to augment your strength, and select food that complements your gear progression and Skill Speed requirements. With each sip and bite, you will unlock new levels of power and precision, solidifying your place among the realm's elite warriors.
Now, raise your katana high, savor the nourishment of your chosen food, and let the potions surge through your veins. The realm of Final Fantasy XIV awaits your arrival. Embrace your destiny, conquer your foes, and etch your name in the annals of history!
FFXIV Relic Weapons Boost
Simple Carry is a specialized website offering carry services for Final Fantasy XIV players who are looking to unlock various types of Relic Weapons. These weapons, highly sought-after in the game, can be challenging and time-consuming to obtain. However, Simple Carry's team of experienced players is dedicated to helping players unlock these weapons efficiently and quickly, allowing them to enjoy their benefits and show them off to others.
The website provides a range of carry services for different types of Relic Weapons. This includes Manderville Relic Weapons, which are acquired by completing the Hildibrand Manderville questline. Resistance Relic Weapons can be obtained by completing content related to the ongoing storyline. Eureka Relic Weapons are obtained by tackling challenging content within the Eureka zone. Anima Relic Weapons can be acquired through various activities in the Heavensward expansion. Lastly, Zodiac Relic Weapons can be obtained through various activities in the A Realm Reborn expansion.
Simple Carry's team of experts excels in understanding the mechanics and strategies of Final Fantasy XIV. They will work closely with players to develop effective strategies, optimize their character builds, and assist in completing the necessary activities to unlock the desired Relic Weapon.
Samurai DPS Gear and Best in Slot — Endwalker 6.4
Patch 6.4 Week 1 Prog Sets:
Economy Prog Set 6.4

Pentamelded Prog Set 6.4:

In conclusion, the FFXIV Endwalker 6.4 Samurai Job Guide serves as a comprehensive resource for players seeking to master the art of the Samurai in the world of Eorzea. By providing in-depth insights into the job's playstyle, rotations, stat priorities, and consumables, this guide empowers players to optimize their Samurai gameplay and unleash their full potential on the battlefield.
While the path to becoming a skilled Samurai requires dedication and practice, there is an alternative that can expedite your journey to mastery. Simple Carry's boosting services offer a hassle-free and time-saving solution for players who want to fast-track their progress and enjoy a seamless experience. With Simple Carry, you can conveniently access expert Samurai players who will assist you in completing challenging content, obtaining coveted rewards, and achieving your desired goals in FFXIV.
By availing yourself of Simple Carry's boosting services, you can save valuable time and focus on the aspects of the game that truly matter to you. Whether you're aiming to conquer difficult trials, acquire rare gear, or conquer the latest raids, Simple Carry's experienced team will guide you through every step of the way, ensuring a smooth and enjoyable gaming experience.
Say goodbye to frustrating setbacks and endless hours of grinding. With Simple Carry's boosting services, you can enhance your FFXIV journey and witness the rapid growth of your Samurai. Embrace the opportunity to learn from seasoned players, tackle challenging content with ease, and unlock the full potential of your character.
Embark on an adventure like never before, fueled by the expertise of Simple Carry's FF14 Ultimate Boost and FF14 Savage Raid Boost services. Let their skilled team accompany you on your quest to become a legendary Samurai in FFXIV Endwalker 6.4. Embrace the efficiency, convenience, and enjoyment that their services offer, and elevate your FFXIV experience to new heights.
Unlock the true power of the Samurai and conquer the realm of Eorzea with Simple Carry's boosting services. Your epic journey awaits!