

Unleashing the Mystical Power: Red Mage Job Guide for FFXIV Endwalker 6.4
Final Fantasy XIV, a captivating realm of magic and adventure, introduces the enigmatic Red Mage job as a mesmerizing choice for players seeking a balance between spellcasting and melee prowess. Renowned for their ability to seamlessly blend the arcane arts with masterful rapier techniques, Red Mages have carved a unique niche as magical ranged DPS characters in the latest expansion, Endwalker 6.4. In this comprehensive guide, we delve into the intricacies of the Red Mage job, unlocking its potential, and unveiling the path to mastering this captivating class.

Unveiling the Red Mage Job
The Red Mage job in FFXIV is a captivating fusion of magical might and swift swordplay. Distinguished by their distinctive crimson attire, Red Mages stand as versatile adventurers who wield both spells and blades with equal finesse. Their spellcasting prowess revolves around a unique mana-generation mechanic that fuels their captivating spells and empowers their melee strikes. As a spellcaster with a penchant for close-quarters combat, the Red Mage seamlessly blends ranged and melee capabilities, creating a dynamic playstyle that resonates with those who crave variety.
The Path to Power
For aspiring Red Mages, embarking on this journey begins at level 50 and requires ownership of the Stormblood expansion. To unlock this captivating job, venture to the bustling city of Ul'dah, where the secrets of the Red Mage await. As the sun-bathed desert city welcomes you, the path to becoming a Red Mage unfurls before you, promising an odyssey of spellweaving and swordplay like no other.
Mastering the Red Mage
Embracing the role of a Red Mage means embracing both the arcane and the martial. Your journey involves mastering the art of spellcasting to generate mana, a magical wellspring that empowers your rapier strikes and unleashes potent melee combos. Every swing of your rapier becomes a canvas for your arcane creativity, culminating in breathtaking finisher spells that leave your adversaries in awe. The fluidity of transitioning between spells and swordplay sets Red Mages apart, requiring players to exhibit strategic prowess and split-second decision-making.
Dive into the realm of the Red Mage in FFXIV and embark on a journey to mastery, uncovering the techniques and strategies that lead to becoming a true expert. Explore the intricacies of this versatile job and hone your skills to perfection.
For those seeking to swiftly learn and gear up, Simple Carry proudly introduces its FFXIV Ultimate Raid Boost and Savage Raid Boost services. Our experienced teams guide you through challenging raids, enhancing your skills and aiding in gear acquisition, ensuring rapid progress and advancement.
Engage with the insights into mastering the Red Mage and wave farewell to uncertainties. Whether you're striving to optimize your gameplay, conquer the toughest raids, or refine your expertise, our comprehensive insights, strategies, and tips await your exploration. Elevate your journey with Simple Carry's services, ensuring a streamlined path to both learning and gearing success. Trust in Simple Carry and embark on a journey of accomplishment and mastery.
Embracing the Endwalker 6.4 Experience
In the ever-evolving landscape of FFXIV, the Endwalker 6.4 expansion beckons, promising thrilling adventures and newfound horizons for Red Mages and adventurers alike. As you explore the latest content and engage in epic battles, the Red Mage job's potential unfolds in exciting ways. From unlocking new spells to refining your melee techniques, Endwalker 6.4 presents a wealth of opportunities for Red Mages to further enhance their capabilities and etch their mark on the realm.
Conclusion
The Red Mage job stands as a testament to the harmonious coalescence of magic and melee, offering FFXIV players an engaging and versatile gameplay experience. From the intricate mana management to the exhilarating rhythm of spell and sword, mastering the Red Mage job is a rewarding odyssey that transcends traditional roles. As the realms of FFXIV continue to expand with the Endwalker 6.4 update, the Red Mage job remains a captivating choice for those seeking to embark on a journey that defies convention and embraces the extraordinary.
Need a cool looking weapon for Red Mage? Purchase our Ultimate Boosting Service for FFXIV
Venture forth, brave adventurer, into the expansive and mythical lands of Eorzea! Are you poised, with grit and determination, to test the strength of your mettle and etch your name alongside the illustrious legends that have shaped this world? Then prepare yourself, for we present to you the FFXIV Ultimate boosts, an unparalleled offering from the master artisans at Simple Carry. This exclusive compilation encompasses six monumental raids, each a testament to the intricate design, treacherous encounters, and splendid tales that Eorzea holds.
From the awe-inspiring aesthetics to the intense combat mechanics, these raids promise a journey unlike any other. They beckon with the allure of precious rewards, tales of valor, and an invitation to write your own chapter in the annals of Eorzean history. And with each raid, comes a new arena, a fresh set of adversaries, and a distinct narrative that will challenge and captivate both your skill and spirit.
So, if you're in pursuit of mastering the unknown, of pushing the boundaries of your capabilities, and of unearthing the vast treasures and stories embedded in Eorzea's heart, then you've found your calling. Stand with us, with Simple Carry, and let us journey together into the abyss of these raids. Unlock not just the secrets they guard, but also the dormant power and potential within yourself. The road to legendary status awaits. Are you prepared to embark on this epic odyssey?
Diving Deeper into the Red Mage Playstyle: Balancing Magic and Melee
Within the enchanting realm of Final Fantasy XIV, the Red Mage emerges as a captivating and versatile DPS job, captivating players with its unique blend of spellcasting prowess and elegant melee maneuvers. Delve into the intricacies of the Red Mage's distinctive playstyle as we explore its magical mechanics, strategic intricacies, and remarkable utility, all of which set it apart in the mesmerizing landscape of FFXIV. Join us on a journey through the arcane and martial, as we uncover the multifaceted essence of the Red Mage's combat dynamics.
Unveiling the Dance of Mana
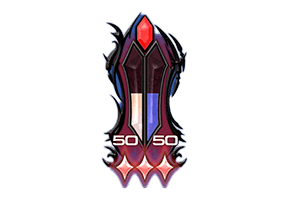
At the heart of the Red Mage's combat strategy lies the manipulation of its Black and White Mana gauges, a delicate dance that fuels its mystical powers. Casting spells is the conduit through which the Red Mage generates these vital energies, striving to achieve equilibrium at the coveted 50|50 balance. Once this equilibrium is reached, the Red Mage channels the amassed mana into a seamless melee combo, an enchanted sequence of three melee abilities intertwined with three potent instant-cast finisher spells. This rhythm defines the Red Mage's core gameplay, demanding precision and timing to maximize both damage output and mobility.
Dualcast: The Essence of Mobility
A hallmark trait of the Red Mage, Dualcast, bestows the power of instant casting upon every alternate spell. This unique ability not only accelerates spellcasting but also grants the Red Mage unparalleled mobility during the dynamic interplay between spells. Embracing Dualcast, Red Mages seamlessly weave between casting and movement, defying the conventional constraints of stationary spellcasting. This mobility is a testament to the job's fluidity, enabling players to swiftly adapt to changing battlefield scenarios and maintain optimal positioning.
Utility Beyond Compare
The allure of the Red Mage extends beyond its spellcasting and melee artistry. It stands as a beacon of utility within the FFXIV realm, gracing parties with invaluable assets that elevate team dynamics. Embolden, a potent raidwide damage buff, emanates from the Red Mage, empowering comrades to unleash their potential upon the battlefield. Beyond this, the Red Mage's repertoire boasts Magick Barrier, a raidwide mitigation and healing boon, safeguarding allies against incoming threats.
In the face of adversity, the Red Mage's utility truly shines. Verraise, a lifeline in critical moments, extends a helping hand to beleaguered healers, granting the ability to resurrect fallen allies. Vercure, another tool in the Red Mage's arsenal, serves as a healing lifeline during periods of downtime or in the midst of uncharted progression. These capabilities transform the Red Mage into a pillar of support, reinforcing the bonds of camaraderie on the front lines.
Unraveling the Layers
While the Red Mage embraces a reputation as an accessible job, its potential unveils layers of depth for those who seek to master its intricacies. Novices find solace in its intuitive mechanics, seamlessly transitioning between spellcasting and melee strikes. Yet, for those with a hunger for challenge, the Red Mage offers a higher skill ceiling, beckoning skilled players to push their limits and optimize their rotations to harness its full potential.
In the grand tapestry of Final Fantasy XIV's intricate gameplay, the Red Mage emerges as a multifaceted gem, harmoniously weaving magic and melee into a symphony of power. Embark on this journey of arcane revelations and swordplay finesse, where every spell and melee combo becomes a brushstroke on the canvas of combat. Whether you're drawn by the allure of utility or captivated by the thrill of mastering its intricacies, the Red Mage stands as an embodiment of balance in the dynamic tapestry of FFXIV's adventures.
Analyzing the Prowess and Challenges of the Red Mage: Unveiling Strengths and Weaknesses
In the ever-evolving realm of Final Fantasy XIV, the Red Mage emerges as a captivating enigma, wielding a unique blend of magic and melee prowess. As adventurers traverse the diverse landscapes and epic battles of Eorzea, understanding the nuances of the Red Mage's capabilities becomes essential. Delve into the intricate details of the Red Mage's strengths and weaknesses, unraveling the threads that weave its combat tapestry and discovering how this job navigates the diverse challenges of the FFXIV universe.
Leveraging Strengths: The Red Mage Advantage
Intuitive Mastery: Seamless Transition
One of the hallmarks of the Red Mage is its intuitive rotation. This characteristic enables newcomers to swiftly grasp the essence of the job, making it a perfect choice for those venturing into the realm of DPS classes. The ease of transitioning between spellcasting and melee strikes offers players a seamless experience, ensuring that the Red Mage stands as an accessible option for adventurers of all skill levels.
Unveiling Party Support: A Beacon of Utility
Beyond its individual prowess, the Red Mage shines as a beacon of party support. With a diverse array of utility spells at its disposal, the Red Mage enhances the effectiveness of the entire team. Embolden, a powerful raidwide damage buff, empowers allies to reach new heights of devastation, transforming battles into triumphant symphonies. Additionally, the Red Mage's repertoire includes the invaluable Magick Barrier, bestowing party members with mitigation and healing to weather storms and emerge victorious.
Burst Flexibility: Timing Is Everything
One of the Red Mage's most enchanting qualities lies in its ability to adapt its burst timings to the ebb and flow of battle. The job's innate flexibility grants players the freedom to strategically unleash their power, capitalizing on optimal moments to maximize damage output. This malleability transforms the Red Mage into a dynamic force on the battlefield, capable of aligning its bursts with crucial phases of encounters.
Navigating Weaknesses: Overcoming Challenges
Treading Carefully: Movement Constraints
While the Red Mage exudes grace and power, its movement mechanics demand thoughtful planning, particularly in the face of intricate raid mechanics and melee combos. The necessity to anticipate and prepare for movement adds an extra layer of strategy, compelling players to anticipate and adapt to the battlefield's ever-changing landscape. This dynamic challenges the Red Mage community to embrace careful positioning while maintaining its mesmerizing rhythm of combat.
Relying on Team Synergy: The Strength of Unity
In the intricate tapestry of FFXIV, no job stands alone. The Red Mage's capacity to output maximum damage often hinges upon the synergy within the party. To truly unleash its potential, the Red Mage thrives in the presence of a robust and cohesive team, highlighting the importance of collaborative strategies and harmonious coordination. This reliance on strong party dynamics underscores the cooperative essence that defines FFXIV's engaging gameplay.
Striking the Balance: A Journey of Mastery
As adventurers journey through Eorzea's boundless landscapes, the Red Mage beckons with its blend of accessibility and complexity. Embracing its strengths and acknowledging its challenges, players embark on a path of mastery that weaves magic and melee into an exquisite dance. From intuitive rotations to strategic bursts, the Red Mage invites adventurers to explore its multifaceted dynamics, harmonizing with allies and conquering adversaries in a symphony of power. Whether unleashing a flurry of spells or executing an elegant melee combo, the Red Mage stands as a testament to the art of equilibrium within the vibrant universe of Final Fantasy XIV.
Embarking on the Path of the Red Mage: Unlocking the Enigmatic Job
In the mesmerizing realms of Final Fantasy XIV, the path of the Red Mage awaits those seeking to master the delicate art of balance between spellcasting and swordplay. The Red Mage, a captivating blend of arcane might and martial finesse, stands as a beacon of versatility and power. For adventurers yearning to don the crimson attire of this remarkable job, the journey begins with unlocking its secrets. Delve into the steps required to unlock the Red Mage, and traverse the thresholds of possibility within the dynamic world of Eorzea.
Paving the Way: Prerequisites for Unveiling the Red Mage
Before the enigmatic doors of the Red Mage job swing open, certain prerequisites must be met to prove your readiness for this mesmerizing journey. To unlock the Red Mage, adventurers must first attain level 50 with a Disciple of War or Magic job, showcasing their prowess in the heat of battle and the arcane arts alike. Additionally, access to the Stormblood expansion is a necessity, opening the gateway to a host of new adventures and possibilities.
The Quest Unfolds: "Taking the Red"
With the necessary foundations laid, the path to becoming a Red Mage materializes through the quest "Taking the Red." This pivotal quest, a portal to transformation and mastery, can be discovered amidst the bustling cityscape of Ul'dah, nestled within the Steps of Thal. To initiate this quest, seekers of the Red Mage's essence must journey to the coordinates (x:14.2, y:11.8), where their journey will unfold. Here, amidst the vibrant surroundings, adventurers will encounter challenges and revelations that beckon them to embrace the dual nature of the Red Mage's abilities.
Attaining Mastery: The Fruits of Unlocking
With the quest "Taking the Red" successfully surmounted, a new horizon of power and potential unfurls before you. Your dedication and determination have borne fruit, as you are rewarded with the coveted Red Mage job stone. This emblem of mastery serves as your conduit to the Red Mage's unique abilities and captivating playstyle. As you equip the Red Mage job stone, you stand poised to embark on your journey as a level 50 Red Mage, channeling the arcane forces and unleashing melee combos that redefine combat itself.
Embrace the Red Mage's Symphony
In the grand tapestry of Final Fantasy XIV's expansive universe, the Red Mage emerges as a harmonious fusion of magic and martial prowess. Unlocking this job becomes a voyage of discovery, a testament to your dedication and skills. From mastering the art of spellcasting to weaving seamless melee combinations, the Red Mage welcomes you to a world where the mundane becomes magical and the extraordinary becomes achievable. As you traverse the landscapes of Eorzea, adorned in the attire of the Red Mage, remember that your journey is not merely unlocking a job but embracing a symphony of power, grace, and limitless potential.
Red Mage Gauge
The Balance Gauge displays your current levels of Black Mana and White Mana.
During your casting phase, you generate Black Mana by casting ![]() Verthunder III,
Verthunder III, ![]() Verfire, or
Verfire, or ![]() Verthunder II. White Mana is generated by casting
Verthunder II. White Mana is generated by casting ![]() Veraero III,
Veraero III, ![]() Verstone, or
Verstone, or ![]() Veraero II. Casting
Veraero II. Casting ![]() Jolt II or
Jolt II or ![]() Impact will generate both Black and White Mana. While casting these spells, you must keep the amount of Black Mana and White Mana within 30 of each other, signified by the red crystal at the top of the gauge. If your mana becomes unbalanced, the crystal will change color, and you will begin to generate the lower mana at half of the normal rate.
Impact will generate both Black and White Mana. While casting these spells, you must keep the amount of Black Mana and White Mana within 30 of each other, signified by the red crystal at the top of the gauge. If your mana becomes unbalanced, the crystal will change color, and you will begin to generate the lower mana at half of the normal rate.
Once you have accumulated 50 Black Mana and 50 White Mana, you can begin your melee combo. Your melee combo begins with three weaponskills: ![]() Enchanted Riposte,
Enchanted Riposte, ![]() Enchanted Zwerchhau, and
Enchanted Zwerchhau, and ![]() Enchanted Redoublement. Each of these weaponskills consume Black and White Mana and give you a Mana Stack, shown at the bottom of the job gauge. Once you have three Mana Stacks, you can use your finishers:
Enchanted Redoublement. Each of these weaponskills consume Black and White Mana and give you a Mana Stack, shown at the bottom of the job gauge. Once you have three Mana Stacks, you can use your finishers: ![]() Verflare or
Verflare or ![]() Verholy,
Verholy, ![]() Scorch, and
Scorch, and ![]() Resolution. Casting
Resolution. Casting ![]() Verflare generates Black Mana, and casting
Verflare generates Black Mana, and casting ![]() Verholy generates White Mana. Casting
Verholy generates White Mana. Casting ![]() Scorch and
Scorch and ![]() Resolution generates both Black and White Mana.
Resolution generates both Black and White Mana.
Red Mage Actions
| Action Name |
|
|
Effect |
|---|---|---|---|
|
|
|
|
Deals unaspected damage with a potency of 280.Additional Effect: Grants a Mana StackBalance Gauge Cost: 20 Black ManaBalance Gauge Cost: 20 White Mana※This action cannot be assigned to a hotbar. |
|
|
|
|
Delivers an attack with a potency of 130.Action upgraded to Enchanted Riposte if both Black Mana and White Mana are at 20 or more. |
|
|
|
|
MP Cost: 200.0 Deals unaspected damage with a potency of 170.Additional Effect: Increases both Black Mana and White Mana by 2 |
|
|
|
|
MP Cost: 300.0 Deals lightning damage with a potency of 360.Additional Effect: Increases Black Mana by 6Additional Effect: 50% chance of becoming Verfire ReadyDuration: 30s |
|
|
|
|
Rushes target and delivers an attack with a potency of 130.Maximum Charges: 2Cannot be executed while bound. |
|
|
|
|
MP Cost: 300.0 Deals wind damage with a potency of 360.Additional Effect: Increases White Mana by 6Additional Effect: 50% chance of becoming Verstone ReadyDuration: 30s |
|
|
|
|
MP Cost: 400.0 Deals unaspected damage with a potency of 120 to target and all enemies nearby it.Acceleration Potency: 170Additional Effect: Increases both Black Mana and White Mana by 3 |
|
|
|
|
MP Cost: 400.0 Deals lightning damage with a potency of 140 to target and all enemies nearby it.Additional Effect: Increases Black Mana by 7 |
|
|
|
|
MP Cost: 400.0 Deals wind damage with a potency of 140 to target and all enemies nearby it.Additional Effect: Increases White Mana by 7 |
|
|
|
|
MP Cost: 200.0 Deals fire damage with a potency of 330.Additional Effect: Increases Black Mana by 5Can only be executed while Verfire Ready is active. |
|
|
|
|
MP Cost: 200.0 Deals earth damage with a potency of 330.Additional Effect: Increases White Mana by 5Can only be executed while Verstone Ready is active. |
|
|
|
|
Deals unaspected damage with a potency of 150.Combo Action: Riposte or Enchanted RiposteCombo Potency: 340Additional Effect: Grants a Mana StackBalance Gauge Cost: 15 Black ManaBalance Gauge Cost: 15 White Mana※This action cannot be assigned to a hotbar. |
|
|
|
|
Delivers an attack with a potency of 100.Combo Action: Riposte or Enchanted RiposteCombo Potency: 150Action upgraded to Enchanted Zwerchhau if both Black Mana and White Mana are at 15 or more. |
|
|
|
|
Delivers an attack with a potency of 180.Additional Effect: 15-yalm backstepMaximum Charges: 2Cannot be executed while bound.Shares a recast timer with Engagement. |
|
|
|
|
Delivers an attack with a potency of 180.Maximum Charges: 2Shares a recast timer with Displacement. |
|
|
|
|
Delivers an attack with a potency of 460. |
|
|
|
|
Ensures the next Verthunder III, Veraero III, or Impact can be cast immediately.Duration: 20sAdditional Effect: Increases the potency of Impact by 50Additional Effect: Ensures Verthunder III and Veraero III trigger Verfire Ready or Verstone Ready respectivelyMaximum Charges: 2 |
|
|
|
|
Deals unaspected damage with a potency of 130.Combo Action: Enchanted ZwerchhauCombo Potency: 500Additional Effect: Grants a Mana StackBalance Gauge Cost: 15 Black ManaBalance Gauge Cost: 15 White Mana※This action cannot be assigned to a hotbar. |
|
|
|
|
Delivers an attack with a potency of 100.Combo Action: Zwerchhau or Enchanted ZwerchhauCombo Potency: 230Action upgraded to Enchanted Redoublement if both Black Mana and White Mana are at 15 or more. |
|
|
|
|
Deals unaspected damage with a potency of 130 to all enemies in a cone before you.Additional Effect: Grants a Mana StackBalance Gauge Cost: 20 Black ManaBalance Gauge Cost: 20 White Mana※This action cannot be assigned to a hotbar. |
|
|
|
|
Delivers an attack with a potency of 60 to all enemies in a cone before you.Action upgraded to Enchanted Moulinet if both Black Mana and White Mana are at 20 or more. |
|
|
|
|
MP Cost: 500.0 Restores target's HP.Cure Potency: 350 |
|
|
|
|
Delivers an attack with a potency of 360 to target and all enemies nearby it. |
|
|
|
|
Increases own magic damage dealt by 5% and damage dealt by nearby party members by 5%.Duration: 20s |
|
|
|
|
Increases both Black Mana and White Mana by 50.Additional Effect: Grants 6 stacks of ManaficationManafication Effect: Increases magic damage dealt by 5%Duration: 15sAll combos are canceled upon execution of Manafication.Can only be executed while in combat. |
|
|
|
|
MP Cost: 200.0 Deals unaspected damage with a potency of 310.Additional Effect: Increases both Black Mana and White Mana by 2 |
|
|
|
|
MP Cost: 2400.0 Resurrects target to a weakened state. |
|
|
|
|
MP Cost: 400.0 Deals unaspected damage with a potency of 210 to target and all enemies nearby it.Acceleration Potency: 260Additional Effect: Increases both Black Mana and White Mana by 3 |
|
|
|
|
Deals fire damage to target and all enemies nearby it with a potency of 580 for the first enemy, and 60% less for all remaining enemies.Additional Effect: Increases Black Mana by 11Additional Effect: 20% chance of becoming Verfire ReadyDuration: 30sChance to become Verfire Ready increases to 100% if White Mana is higher than Black Mana at time of execution.Mana Stack Cost: 3※This action cannot be assigned to a hotbar. |
|
|
|
|
Deals unaspected damage to target and all enemies nearby it with a potency of 580 for the first enemy, and 60% less for all remaining enemies.Additional Effect: Increases White Mana by 11Additional Effect: 20% chance of becoming Verstone ReadyDuration: 30sChance to become Verstone Ready increases to 100% if Black Mana is higher than White Mana at time of execution.Mana Stack Cost: 3※This action cannot be assigned to a hotbar. |
|
|
|
|
Deals unaspected damage with a potency of 330.Balance Gauge Cost: 5 Black ManaBalance Gauge Cost: 5 White Mana※This action cannot be assigned to a hotbar. |
|
|
|
|
Delivers an attack with a potency of 100.Action upgraded to Enchanted Reprise if both Black Mana and White Mana are at 5 or more. |
|
|
|
|
MP Cost: 400.0 Deals unaspected damage to target and all enemies nearby it with a potency of 680 for the first enemy, and 60% less for all remaining enemies.Combo Action: Verflare or VerholyAdditional Effect: Increases both Black Mana and White Mana by 4Jolt II and Impact are changed to Scorch upon landing Verflare or Verholy as a combo action.※This action cannot be assigned to a hotbar. |
|
|
|
|
MP Cost: 300.0 Deals wind damage with a potency of 380.Additional Effect: Increases White Mana by 6Additional Effect: 50% chance of becoming Verstone ReadyDuration: 30s |
|
|
|
|
MP Cost: 300.0 Deals lightning damage with a potency of 380.Additional Effect: Increases Black Mana by 6Additional Effect: 50% chance of becoming Verfire ReadyDuration: 30s |
|
|
|
|
Reduces magic damage taken by self and nearby party members by 10%, while increasing HP recovered by healing actions by 5%.Duration: 10s |
|
|
|
|
MP Cost: 400.0 Deals unaspected damage to all enemies in a straight line before you with a potency of 750 for the first enemy, and 60% less for all remaining enemies.Combo Action: ScorchAdditional Effect: Increases both Black Mana and White Mana by 4Scorch is changed to Resolution upon landing Scorch as a combo action.※This action cannot be assigned to a hotbar. |
Role Actions
| Action Name |
|
|
Effect |
|---|---|---|---|
|
|
|
|
Lowers target's physical damage dealt by 5% and magic damage dealt by 10%.Duration: 10s |
|
|
|
|
MP Cost: 800.0 Puts target and all nearby enemies to sleep.Duration: 30sCancels auto-attack upon execution. |
|
|
|
|
Gradually restores own MP.Potency: 55Duration: 21s |
|
|
|
|
Next spell is cast immediately.Duration: 10s |
|
|
|
|
Spells can be cast without interruption.Additional Effect: Nullifies most knockback and draw-in effectsDuration: 6s |
Red Mage Traits
| Action Name | Acquired | Effect |
|---|---|---|
| Lv. 1 |
Grants the effect of Dualcast upon casting any spell with a cast time. While under the effect of Dualcast, your next spell will require no time to cast. Effect is canceled upon execution of any action other than an ability. Auto-attacks do not cancel effect. Duration: 15s |
|
| Lv. 20 |
Increases base action damage and HP restoration by 10%. |
|
| Lv. 40 |
Increases base action damage and HP restoration by 30%. |
|
| Lv. 62 |
Upgrades Jolt to Jolt II. Also increases the potency of Verthunder and Veraero to 360, and the potency of Verfire and Verstone to 300. |
|
| Lv. 66 |
Upgrades Scatter to Impact. |
|
| Lv. 68 |
Adds a Mana Stack to your Balance Gauge upon landing Enchanted Riposte, Enchanted Zwerchhau, Enchanted Redoublement, or Enchanted Moulinet, up to a maximum of 3. Upon gaining 3 Mana Stacks, Verthunder and Verthunder II are upgraded to Verflare. Upon learning Verholy, gaining 3 Mana Stacks also upgrades Veraero and Veraero II to Verholy. |
|
| Lv. 72 |
Increases Displacement and Engagement potency to 180. |
|
| Lv. 74 |
Reduces Contre Sixte recast timer to 35 seconds and increases the potency of both Verthunder II and Veraero II to 120. |
|
| Lv. 78 |
Reduces Manafication recast timer to 110 seconds and adds an additional effect that increases magic damage dealt by 5%. |
|
| Lv. 82 |
Upgrades Verthunder to Verthunder III and Veraero to Veraero III. Upon gaining 3 Mana Stacks, Verthunder III is upgraded to Verflare and Veraero III is upgraded to Verholy. |
|
| Lv. 84 |
Increases the potency of Enchanted Riposte to 280, Verthunder II to 140, Veraero II to 140, Verfire to 330, Verstone to 330, Enchanted Zwerchhau to 150, Enchanted Redoublement to 130, Jolt II to 310, Impact to 210, and Enchanted Reprise to 330. |
|
| Lv. 88 |
Allows the accumulation of charges for consecutive uses of Acceleration. Maximum Charges: 2 |
|
| Lv. 90 |
Increases maximum stacks of Manafication to 6. |
Unveiling the Enigmatic Lore of the Red Mage
Nestled within the breathtaking terrain of Abalathia's Spine, the sprawling mountainous expanse known as Gyr Abania unfolds its secrets like pages of an ancient tome. Here, amidst the towering peaks and rugged landscapes, a tale of resilience, survival, and transformation takes root, as the stage is set for the emergence of the enigmatic Red Mages. Embark on a journey through time and space, as we delve into the rich lore that shapes the identity of the Red Mage job in the vibrant world of Final Fantasy XIV.
A Refuge Amidst Chaos
In the annals of Eorzean history, Gyr Abania emerges as a refuge, a sanctuary for those fleeing the devastating aftermath of the Sixth Umbral Calamity. Guided by a celestial beacon, these beleaguered souls found solace on the eastern fringes of Abalathia's Spine, far from the treacherous clutches of floodwaters that marked the aftermath of the Calamity. It is in this elevated haven that their collective fate takes a turn, birthing the legacy of the Red Mage.
A Unified Destiny
Amidst the varied assembly of survivors, a remarkable convergence takes place—a meeting of the displaced sorcerous cities of Mhach and Amdapor. Sworn enemies in times of old, these once-rival cities chose to bury the hatchet of animosity, embracing unity for the sake of a shared future. The echoes of their adversarial history faded, making way for a bond forged by survival and the promise of renewal.
Casting Aside the Past
With the intention of weaving a new destiny, the refugees of Mhach and Amdapor set aside the tales of enmity that had once divided them. The vestiges of their tumultuous pasts were shed, like tattered robes cast to the wind. In this act of collective renewal, the foundations were laid for the birth of a new discipline—one that would amalgamate the remnants of their once-powerful arts into something uniquely transformative.
The Birth of the Red Mage
From the crucible of unity and shared purpose, a new class of adventurers emerged—those who would become the first Red Mages. Armed with rapiers and unwavering determination, these pioneers stepped forward to counter the relentless onslaught of destruction threatening to consume their world. The Red Mage's narrative unfurled as a story of adaptation, resilience, and the forging of a destiny that transcended the boundaries of history.
Crafting Legends Through Time
The lore of the Red Mage resonates as a testament to the intricacies of evolution and the indomitable spirit of those who shape their destinies. From sworn enemies to steadfast allies, from sorcery to swordplay, the Red Mage's journey embodies the essence of transformation and the power of unity. As the epic saga of Eorzea continues to unfold, the legacy of the Red Mage stands as a living testament to the potential that emerges from the convergence of diverse paths and the emergence of new narratives within the dynamic world of Final Fantasy XIV.
Mastering the Art of Spell and Sword: Red Mage Rotation Guide for Endgame Adventures
Within the intricate tapestry of Final Fantasy XIV's endgame, the Red Mage emerges as a captivating and dynamic job, characterized by the harmonious fusion of magic and melee prowess. Embarking on the journey of the Red Mage requires not only an understanding of its base rotation but also the finesse to wield its resource-based mechanics to their full potential. In this comprehensive guide, we unravel the intricate threads of the Red Mage's endgame rotation, illuminating the path to maximizing damage output and capitalizing on the windows of opportunity that lie before you.
Unveiling the Essence: Red Mage's Base Rotation
At the core of the Red Mage's rotation lies a rhythm that seamlessly intertwines spells and swordplay. The base rotation of the Red Mage is designed with a touch of elegance and simplicity, ensuring that both novices and experienced players can grasp its fundamentals. The ability to transition between casting and melee seamlessly is the cornerstone of the Red Mage's combat strategy, enabling you to weave an intricate dance of power across the battlefield.
Embracing the Symphony of Flexibility
The allure of the Red Mage's rotation transcends its simplicity, evolving into a symphony of flexibility that adapts to your circumstances and strategic needs. As a resource-based job, the Red Mage introduces an element of choice into its rotation, where your primary objective is to utilize your resources strategically. The resources at your disposal, Black and White Mana, serve as the palette upon which you craft your performance. Your goal is to channel these resources into precise bursts of damage during buff windows, orchestrating an elegant crescendo of destruction.
The Dance of Buff Windows
A key aspect of mastering the Red Mage's rotation is recognizing and optimizing the buff windows that punctuate the flow of battle. These windows of opportunity provide a canvas upon which you unleash your accumulated resources, magnifying your damage potential. By aligning your resource expenditure with the onset of buffs, such as raidwide damage buffs or personal cooldowns, you elevate the impact of your spell and melee combinations to unparalleled heights.
The Pursuit of Mastery
As you delve deeper into the intricacies of the Red Mage's rotation, you embark on a journey of continuous refinement. The simplicity of the base rotation opens the door to a world of advanced optimization for those who seek to elevate their gameplay. The pursuit of mastery involves not only understanding the Red Mage's core mechanics but also delving into the nuances of movement, positioning, and timing to extract every ounce of potential from each encounter.
Illuminating the Path Forward
In the ever-evolving landscape of FFXIV, the Red Mage's endgame rotation beckons adventurers to explore the harmony of magic and melee. From the graceful interplay of spells to the strategic utilization of resource expenditure, the Red Mage's journey is a testament to the art of combat finesse. By mastering the intricacies of its rotation, you breathe life into the symphony of damage, weaving a narrative of power and precision that leaves a lasting mark on the realm of Eorzea. As you continue to refine your skills and push the boundaries of your capabilities, remember that the Red Mage's rotation is not just a sequence of actions—it's an embodiment of the artistry and mastery that define your journey as an endgame adventurer.
Casting Phase
The casting phase will revolve around casting short spells to proc ![]() Dualcast and then instantly casting long spells.
Dualcast and then instantly casting long spells. ![]() Verthunder III and
Verthunder III and ![]() Veraero III are your single-target long cast spells and should never be hardcasted outside of the opener.
Veraero III are your single-target long cast spells and should never be hardcasted outside of the opener. ![]() Jolt II,
Jolt II, ![]() Verfire, and
Verfire, and ![]() Verstone are your short cast spells you will be hardcasting throughout a fight.
Verstone are your short cast spells you will be hardcasting throughout a fight. ![]() Jolt II is always available, while
Jolt II is always available, while ![]() Verfire and
Verfire and ![]() Verstone have a 50% chance to become available after using
Verstone have a 50% chance to become available after using ![]() Verthunder III and
Verthunder III and ![]() Veraero III, respectively.
Veraero III, respectively.
A dualcast pair should look like this:
-
 Verfire or
  Verstone. If neither are available, use
  Jolt II
-
 Verthunder III or
  Veraero III
You should alternate spell casts to build both Black Mana and White Mana while keeping the difference lower than 30. Prioritize picking your long cast spell based on what proc you do not have available to minimize the amount of times you must cast ![]() Jolt II throughout a fight.
Jolt II throughout a fight.
If there is downtime during a fight, ![]() Vercure can be used to proc
Vercure can be used to proc ![]() Dualcast and begin the next phase with an instant long cast spell.
Dualcast and begin the next phase with an instant long cast spell.
Melee Combo
Your melee combo costs 50 Black Mana and 50 White Mana. Once you have enough to execute a combo, your rotation will look like this:
 Enchanted Riposte
 Enchanted Zwerchhau
 Enchanted Redoublement
-
 Verholy or
  Verflare
 Scorch
 Resolution
Because a melee combo costs 50 Black and White Mana, and you can store up to 100 Black and White Mana, your melee combo is flexible and does not have to be used immediately. This allows you to take advantage of your melee combo to use it for mobility or to put more damage into buffs, which will be explained further below.
Damage Off-Global Cooldowns
One of the strongest parts of Red Mage's damage is its off-global cooldowns. ![]() Fleche,
Fleche, ![]() Contre Sixte,
Contre Sixte, ![]() Corps-a-corps,
Corps-a-corps, ![]() Engagement, and
Engagement, and ![]() Displacement are all oGCDs that should be used as much as possible to maximize damage throughout a fight.
Displacement are all oGCDs that should be used as much as possible to maximize damage throughout a fight.
![]() Fleche and
Fleche and ![]() Contre Sixte should both be used on cooldown after the opener to keep their cooldown timer rolling. Because the cooldown on both of these is relatively short, it is easy to lose a usage of each through a fight or phase, hindering your overall damage.
Contre Sixte should both be used on cooldown after the opener to keep their cooldown timer rolling. Because the cooldown on both of these is relatively short, it is easy to lose a usage of each through a fight or phase, hindering your overall damage.
![]() Corps-a-corps,
Corps-a-corps, ![]() Engagement, and
Engagement, and ![]() Displacement should also be used as much as possible to keep their cooldown timer rolling, but these abilities are more flexible due to having two charges.
Displacement should also be used as much as possible to keep their cooldown timer rolling, but these abilities are more flexible due to having two charges. ![]() Corps-a-corps will cause you to jump to the boss, which can be taken advantage of when needed in addition to the damage it does.
Corps-a-corps will cause you to jump to the boss, which can be taken advantage of when needed in addition to the damage it does. ![]() Engagement and
Engagement and ![]() Displacement both have equal potency and share a cooldown timer, so you will primarily be using
Displacement both have equal potency and share a cooldown timer, so you will primarily be using ![]() Engagement.
Engagement.
The order in which damaging oGCDs should be prioritized is as follows:
 Fleche
 Contre Sixte
-
 Engagement or
  Displacement
 Corps-a-corps
Other Off-Global Cooldowns
Other off-global cooldowns Red Mage has as a part of its DPS rotation are ![]() Embolden,
Embolden, ![]() Manafication,
Manafication, ![]() Acceleration, and
Acceleration, and ![]() Swiftcast.
Swiftcast.
![]() Embolden is a raidwide 5% party buff that lasts for 20 seconds. It should be used on cooldown to align with other party buffs unless the full group is holding buffs for a specific purpose.
Embolden is a raidwide 5% party buff that lasts for 20 seconds. It should be used on cooldown to align with other party buffs unless the full group is holding buffs for a specific purpose.
![]() Manafication gives you enough mana to execute a full melee combo and a 5% damage buff on your next six GCDs used. This means that we should always use
Manafication gives you enough mana to execute a full melee combo and a 5% damage buff on your next six GCDs used. This means that we should always use ![]() Manafication either before or during a melee combo to align our finishers and the 5% damage boost. While using
Manafication either before or during a melee combo to align our finishers and the 5% damage boost. While using ![]() Manafication will break any existing combos, the game considers the melee part of our combo and our finishers to be two separate combos, meaning we can use
Manafication will break any existing combos, the game considers the melee part of our combo and our finishers to be two separate combos, meaning we can use ![]() Manafication in between
Manafication in between ![]() Enchanted Redoublement and
Enchanted Redoublement and ![]() Verholy or
Verholy or ![]() Verflare. If being used in between these GCDs, the three buffed GCDs following your finishers can be used on either the start of a second combo or on three normal spell GCDs.
Verflare. If being used in between these GCDs, the three buffed GCDs following your finishers can be used on either the start of a second combo or on three normal spell GCDs.
Because ![]() Manafication has a cooldown of 110 seconds, this means using it on cooldown will drift it out of raid buffs. What is optimal will be fight dependent and killtime dependent. In fights where rushing
Manafication has a cooldown of 110 seconds, this means using it on cooldown will drift it out of raid buffs. What is optimal will be fight dependent and killtime dependent. In fights where rushing ![]() Manafication will allow you to gain an extra usage, this will be optimal. However, in fights where your killtime will not gain you an extra usage,
Manafication will allow you to gain an extra usage, this will be optimal. However, in fights where your killtime will not gain you an extra usage, ![]() Manafication can be held for ten seconds every buff window to align with
Manafication can be held for ten seconds every buff window to align with ![]() Embolden and other party buffs.
Embolden and other party buffs.
![]() Swiftcast is a role action that causes your next GCD to be cast instantly.
Swiftcast is a role action that causes your next GCD to be cast instantly. ![]() Acceleration is a Red Mage-specific ability that is functionally similar to
Acceleration is a Red Mage-specific ability that is functionally similar to ![]() Swiftcast, but it has two charges and also guarantees a proc.
Swiftcast, but it has two charges and also guarantees a proc. ![]() Acceleration can only be used on
Acceleration can only be used on ![]() Verthunder III,
Verthunder III, ![]() Veraero III, and
Veraero III, and ![]() Impact, but these abilities should only ever be used on these spells for damage purposes anyway.
Impact, but these abilities should only ever be used on these spells for damage purposes anyway.
These abilities have two primary functions:
- Keeping uptime when you are moving and cannot stop for a cast
- Keeping your other oGCDs aligned
The most important way to use these abilities is to use them when you need to in order to keep uptime during movement-heavy mechanics. Keeping your GCD rolling is the most important basic of playing Red Mage, and these abilities enable you to do so even when executing tough mechanics.
The second way to use these abilities is to keep your other oGCDs aligned, primarily ![]() Fleche,
Fleche, ![]() Contre Sixte,
Contre Sixte, ![]() Embolden, and
Embolden, and ![]() Manafication. A short explanation of this is that each of these ability cooldowns is a multiple of five seconds, and each of our dualcast pairs takes five seconds, meaning our oGCDs will become available to use again during an instant cast GCD each time. Our melee combo, however, takes around 12.7 seconds to execute, meaning our dualcast windows become swapped with each use. This will cause our oGCDs to come off cooldown during a hardcast and drift, which will add up over time and cause lost usages. Because
Manafication. A short explanation of this is that each of these ability cooldowns is a multiple of five seconds, and each of our dualcast pairs takes five seconds, meaning our oGCDs will become available to use again during an instant cast GCD each time. Our melee combo, however, takes around 12.7 seconds to execute, meaning our dualcast windows become swapped with each use. This will cause our oGCDs to come off cooldown during a hardcast and drift, which will add up over time and cause lost usages. Because ![]() Swiftcast and
Swiftcast and ![]() Acceleration occupy a single 2.5 second GCD window, they achieve the same result of swapping our dualcast windows. This means we can use them to our advantage by using one before or after a melee combo to keep our dualcast windows aligned with our oGCD cooldowns.
Acceleration occupy a single 2.5 second GCD window, they achieve the same result of swapping our dualcast windows. This means we can use them to our advantage by using one before or after a melee combo to keep our dualcast windows aligned with our oGCD cooldowns.
Opener
This is a general purpose opener that can be used for the majority of encounters. In specific fights where phasing requires you to use any oGCDs earlier to gain a use, this opener can be altered slightly to fit your needs.
- Precast Verthunder III at five seconds
-
Veraero III →
 Swiftcast +
  Acceleration
-
Verthunder III → Potion
-
Verthunder III →
 Embolden +
  Manafication
-
Enchanted Riposte → Fleche
-
Enchanted Zwerchhau → Contre Sixte
-
Enchanted Redoublement → Corps-a-corps + Engagement
-
Verholy → Corps-a-corps + Engagement
- Scorch
- Resolution
- Verfire
- Verthunder III
- Verstone
- Veraero III
- Jolt II
-
Verthunder III → Fleche
Playing into Buffs and Potion
The flexibility of Red Mage's melee combo allows you to play into buffs efficiently. Keeping ![]() Embolden aligned with other party buffs will allow you to maximize your damage during buff windows. Your basic goal is to fit one melee combo into every buff window. If you do not need an extra melee combo elsewhere for mobility, it is also possible to fit an extra three finishers into 20-second buffs, including your own
Embolden aligned with other party buffs will allow you to maximize your damage during buff windows. Your basic goal is to fit one melee combo into every buff window. If you do not need an extra melee combo elsewhere for mobility, it is also possible to fit an extra three finishers into 20-second buffs, including your own ![]() Embolden every buff window. To accomplish this, you must have a minimum mana count of 92|81, or have enough for a full melee combo and
Embolden every buff window. To accomplish this, you must have a minimum mana count of 92|81, or have enough for a full melee combo and ![]() Manafication if you are not using it on cooldown. Begin your first melee combo five seconds before
Manafication if you are not using it on cooldown. Begin your first melee combo five seconds before ![]() Embolden comes off cooldown, and weave
Embolden comes off cooldown, and weave ![]() Embolden after
Embolden after ![]() Enchanted Redoublement. By doing this, you will be able to fit the following into buffs:
Enchanted Redoublement. By doing this, you will be able to fit the following into buffs:
-
Verholy or Verflare
- Scorch
- Resolution
- Enchanted Riposte
- Enchanted Zwerchhau
- Enchanted Redoublement
-
Verholy or Verflare
- Scorch
- Resolution
Keep in mind that while ![]() Embolden only affects our personal magical damage and therefore does not affect our oGCDs, our oGCDs are still buffed by other party buffs. Therefore, it is ideal to fit two charges of
Embolden only affects our personal magical damage and therefore does not affect our oGCDs, our oGCDs are still buffed by other party buffs. Therefore, it is ideal to fit two charges of ![]() Corps-a-corps and
Corps-a-corps and ![]() Engagement into buff windows when possible.
Engagement into buff windows when possible.
For our potion window, our priority is to fit two full melee combos under a potion. If holding ![]() Manafication for each buff window, it is possible to fit three uses of
Manafication for each buff window, it is possible to fit three uses of ![]() Scorch and
Scorch and ![]() Resolution into a potion for a small potency gain. To do this, you must have 73|73 mana and
Resolution into a potion for a small potency gain. To do this, you must have 73|73 mana and ![]() Manafication available for use. Start your first melee combo when there is around 17 seconds left on the cooldown for
Manafication available for use. Start your first melee combo when there is around 17 seconds left on the cooldown for ![]() Embolden, and use a potion after your first
Embolden, and use a potion after your first ![]() Verholy or
Verholy or ![]() Verflare. An ideal potion using this method would look like this:
Verflare. An ideal potion using this method would look like this:
- Scorch
- Resolution
- Enchanted Riposte
- Enchanted Zwerchhau
-
Enchanted Redoublement → Embolden + Manafication
-
Verholy or Verflare
- Scorch
- Resolution
- Enchanted Riposte
- Enchanted Zwerchhau
- Enchanted Redoublement
-
Verholy or Verflare
- Scorch
- Resolution
Multi-Target Rotation
The multi-target rotation is very similar to the single target rotation, with some changes to the abilities used.
Two Targets
- Hardcast Verfire, Verstone, or Jolt II
- Dualcast
 Impact
- Use single target melee combo
Three or More Targets
- Hardcast
 Verthunder II or
  Veraero II
- Use Impact
- Use
 Enchanted Moulinet x3 for melee combo
Want to get full BIS gear today for any job? Purchase our Savage Raid Boost through Pandaemonium: Anabaseios.
Simple Carry, a dedicated website catering to Final Fantasy XIV players, offers a comprehensive range of carry services specifically tailored for completing challenging Savage Raids. These services encompass a variety of raid content from different expansions, including Pandaemonium from Endwalker, Omega from Stormblood, Alexander from Heavensward, and A Coil of Bahamut from A Realm Reborn. With a team of experienced players at their disposal, Simple Carry aims to assist players in obtaining significant power-ups to their gear through successful completion of these demanding raid encounters.
The team at Simple Carry comprises seasoned players who possess extensive knowledge and expertise in tackling Savage Raids. They specialize in providing carry services, wherein they actively participate in the raid content alongside players, offering guidance, support, and strategic assistance throughout the encounters. With their profound understanding of the raid mechanics and optimal strategies, the team ensures that players can overcome the challenges and obtain the desired rewards.
Savage Raids in Final Fantasy XIV are renowned for their difficulty and the significant power-ups they offer to players' gear. Simple Carry's carry services serve as a gateway for players to acquire these substantial gear enhancements. By partnering with the experienced team, players can expedite their progress, secure victory in these formidable encounters, and reap the rewards that come with conquering Savage Raids.
Whether it's the latest content from Endwalker or the challenging encounters from previous expansions, Simple Carry's carry services encompass a wide range of Savage Raids. Players can rely on the expertise and support of the experienced team to navigate the intricacies of each raid encounter, earn powerful gear upgrades, and elevate their character's capabilities.
Navigating the Maze of Numbers: Unraveling the Stat Priority for Red Mage Mastery
Within the dynamic realm of Final Fantasy XIV, the art of mastering the Red Mage transcends mere skill; it's a delicate dance that weaves together intellect, precision, and strategic decision-making. As you delve into the captivating intricacies of the job, understanding the optimal allocation of stats becomes paramount. In this comprehensive guide, we unveil the labyrinthine web of stat priorities that shapes the essence of the Red Mage, guiding you through the terrain of weapon damage, intelligence, substats, and more.
Unleashing the Power: Prioritizing Stats for Red Mage
In the intricate tapestry of the Red Mage's mastery, certain stats emerge as pivotal, their influence resonating throughout every spellcast and melee strike. The hierarchy of stat priorities for a Red Mage unfolds as follows:
-
Weapon Damage: The cornerstone of your damage potential, weapon damage lays the foundation for your prowess in both magical and physical combat.
-
Intelligence and Vitality: Your intellect fuels the potency of your spells, while vitality bolsters your overall health pool. As universal main stats, these attributes contribute to both damage output and survivability.
-
Critical Hit: With its ability to enhance both critical chance and critical damage, critical hit holds a prime spot in the hierarchy, offering exponential damage potential.
-
Determination ≥ Direct Hit: Determination and Direct Hit provide a linear increase in damage, with determination contributing flat damage and direct hit boosting your critical hit chance.
-
Spell Speed: While often tempting due to its potential to increase casts per minute, Spell Speed's impact on Red Mage's damage remains limited due to its inability to affect certain portions of your damage rotation. Careful consideration is necessary to prevent misalignment within your rotation.
Unveiling the Substats Saga
Beneath the surface of the Red Mage's stat hierarchy lies the realm of substats, a domain characterized by intricate mechanics that dictate your damage potential. In the world of FFXIV, substats operate in "stat tiers," implying that damage gains occur at specific values rather than incremental points.
-
Critical Hit: Operating quadratically, critical hit elevates both your critical chance and the damage inflicted by critical hits, creating a symphony of heightened damage potential.
-
Determination and Direct Hit: Linear in their scaling, determination and direct hit provide a consistent percentage increase in damage. Determination enhances flat damage, while direct hit boosts your critical hit chance.
The Dance with Spell Speed
For Red Mages, the allure of Spell Speed is tempered by its limitations. While it might grant you the allure of more casts per minute, its impact remains incomplete due to its exclusion from vital portions of your damage rotation. The potential for misalignment in your meticulously crafted rotation further complicates Spell Speed's value proposition. Although not inherently a DPS loss, Spell Speed's contribution pales in comparison to the potency offered by critical hit, determination, and direct hit.
The Irrelevance of Skill Speed, Piety, and Tenacity
In your journey toward Red Mage mastery, it's crucial to understand what to avoid. Skill Speed finds itself on the periphery of relevance, offering minimal benefits to the Red Mage's gameplay. Piety and Tenacity, tailored for healers and tanks, remain extraneous to the Red Mage's needs, standing as vestiges of power beyond the scope of your arsenal.
Carving Your Path to Ascendancy
As you embark on the odyssey of mastering the Red Mage, navigating the sea of numbers and variables becomes an art unto itself. With the intricate understanding of stat priorities as your compass, you stride confidently toward a realm of amplified damage potential, precise rotations, and calculated choices. Every spell you cast, every melee combo you execute, and every buff window you seize become a brushstroke on the canvas of your Red Mage journey. May your path be illuminated by the fusion of intellect and strategy, carving a legacy of mastery within the enchanting realm of Final Fantasy XIV.
Mastering the Art of Materia Melds for Red Mage Excellence
As the alluring world of Final Fantasy XIV unfolds before you, the journey towards Red Mage mastery is one of intricacy and detail. The art of gearing up encompasses not only the acquisition of potent equipment but also the meticulous placement of materia melds that amplify your prowess. In this comprehensive guide, we venture into the realm of materia melds, uncovering the secrets to enhancing your Red Mage's potential, optimizing your stats, and maximizing your damage output.
Elevating Your Arsenal: Materia Melding for Red Mage
The path to perfection begins with the strategic melding of materia, an endeavor that empowers you to customize your gear to mirror your combat philosophy. A general rule of thumb while gearing up as a Red Mage is to prioritize melding Critical Hit wherever possible. This approach guarantees a significant boost to your damage output, provided you do not surpass the innate limit of the gear piece, signaled by an in-game warning.
Embracing the Critical Edge
Critical Hit emerges as a cornerstone of the materia melding strategy for Red Mages. Elevating your critical chance not only increases the frequency of critical hits but also enhances the damage inflicted by these pivotal strikes. By infusing your gear with Critical Hit materia, you ensure that every spell and melee maneuver has the potential to leave a profound impact on the battlefield.
Determining Your Path
As the next step in the materia melding symphony, Determination takes the spotlight. This stat boosts your flat damage output, enriching every spell and strike with a potent surge of power. While slightly overshadowed by Critical Hit, Determination occupies a significant place in the hierarchy of priorities, contributing to the overall tapestry of your damage potential.
Directing Your Destiny with Direct Hit
Direct Hit, the third star in the materia melding constellation, offers a dynamic enhancement to your critical hit chance. Integrating Direct Hit materia into your gear empowers you to strike with precision, amplifying the potency of your critical hits. While Determination and Direct Hit often vie for supremacy, their combined influence underscores your status as a master of strategic versatility.
The Dance of Best-in-Slot Melds
Venturing into the realm of best-in-slot gear sets introduces a new layer of complexity to your materia melding journey. When Determination and Direct Hit find themselves in close proximity in terms of DPS value, melding Direct Hit may take precedence to capitalize on the concept of "stat tiers." The process, however, demands meticulous calculations and consideration, making it a choice often reserved for those who seek the pinnacle of optimization.
Navigating the Shifting Seas
As you advance along your Red Mage journey, it's vital to recognize that materia melding isn't a static endeavor. A single gear piece swap can disrupt the delicate balance of your stat distribution, highlighting the need for calculated decisions in every step of your materia melding odyssey. Careful consideration, research, and a deep understanding of your class's mechanics guide your path toward enlightenment.
Carving a Legacy of Mastery
In the ever-evolving landscape of Final Fantasy XIV, the art of materia melding weaves into your identity as a Red Mage. The melds you choose, the stats you prioritize, and the gear you adorn become an expression of your combat philosophy and strategic finesse. With each meld, you carve a legacy of mastery that transcends the mere numbers on your gear, transforming you into a symphony of magic and might within the dynamic tapestry of Eorzea. As you navigate the labyrinthine choices that define your journey, may your materia melds serve as the brushstrokes of your mastery and the testament to your relentless pursuit of excellence.
The Intricate Dance of Spell Speed: Deciphering its Impact on the Red Mage
In the intricate realm of Final Fantasy XIV, where arcane spells and swift melee strikes converge, the role of Spell Speed within the Red Mage's arsenal emerges as a captivating enigma. This guide delves into the multifaceted relationship between the Red Mage and Spell Speed, uncovering the nuances that shape their combat strategy and the reasons behind the strategic choices they make. Embark on a journey through the dimensions of speed, precision, and damage maximization as we explore the intricate symphony woven by the Red Mage's approach to Spell Speed.
Spell Speed's Enchantment: An Overview
At the heart of the discussion lies Spell Speed's power to reduce the recast time on GCD spells, a potential avenue to cast more spells and cultivate additional mana throughout an encounter. Yet, within the realm of Red Mage mastery, the relationship with Spell Speed is nuanced and contemplative, driven by both the potential it holds and the limitations it imposes.
The Conundrum of Choice
While the allure of quicker GCD spells beckons, the Red Mage's strategic approach shifts the spotlight toward three key stats: Critical Hit, Determination, and Direct Hit. The rationale behind this choice is twofold:
-
Impact on Key Abilities: A significant portion of the Red Mage's damage emanates from a lineup of oGCDs (off-global cooldown abilities) and melee combo strikes. This lineup, including the likes of Fleche, Contre Sixte, and the trio of Enchanted Riposte, Zwerchhau, and Redoublement, remains unaffected by Spell Speed's embrace. In contrast, the triumvirate of Critical Hit, Determination, and Direct Hit infuses these abilities with heightened damage, rendering them more efficient and impactful.
-
Taming the Tempest: The intricate timing of the Red Mage's oGCDs hinges upon the rhythm of the Dualcast trait, which grants every alternate spell an instant cast. Spell Speed's pursuit, while beneficial to GCD spells, can lead to misalignment with oGCDs, a factor that can impact the overall efficiency and fluidity of combat. The delicate balance between swift spellcasting and the precise choreography of oGCDs prompts the Red Mage to exercise caution when approaching the realm of "too fast."
The Measure of Mastery: Balancing Act
Determining the threshold of "too fast" within the Spell Speed spectrum remains a subject of contemplation and analysis among Red Mages. Generally, this boundary tends to materialize around the range of 2.46 or faster, a point where the delicate equilibrium between swift GCDs and oGCD timing starts to waver. As a class that thrives on the symphony of instant casts and precise cooldown management, the Red Mage navigates the potential of misalignment with strategic finesse.
Crafting the Optimal Ensemble
While the allure of more melee combos through increased Spell Speed may tantalize, the Red Mage's keen sense of optimization steers their course toward the trio of Critical Hit, Determination, and Direct Hit. This strategic synergy ensures that every spell and melee strike resonates with maximum potency, forging a dynamic combat strategy that capitalizes on both magical prowess and martial finesse.
The Harmonious Balance
As you traverse the dynamic landscapes of Eorzea as a Red Mage, the relationship with Spell Speed becomes a captivating narrative of balance and strategy. The art of weaving magic and melee, instant casts and deliberate timing, unveils a symphony of damage and precision unique to the Red Mage's mastery. With every spell cast and every melee combo executed, remember that the strategic choices you make craft your legacy as a Red Mage—one that embraces the intricacies of Spell Speed while prioritizing the efficiency of damage, an indelible testament to your mastery within the mesmerizing tapestry of Final Fantasy XIV.
Navigating the Path of Progression: Unveiling the Intricacies of Red Mage Gear Progression
In the ever-evolving tapestry of Final Fantasy XIV, the journey of a Red Mage towards mastery is an enchanting blend of strategy, finesse, and equipment optimization. As you traverse the realms of Eorzea, the quest for the perfect gear becomes a quest for power—a journey that revolves around the delicate art of gear progression. In this comprehensive guide, we embark on a voyage through the intricacies of gear selection, substats, and item levels, demystifying the enigmatic process that transforms a Red Mage into a force to be reckoned with.
The Pulse of Power: Weapon Damage and Intelligence
The symphony of battle finds its crescendo in the realm of weapon damage—a statistic that dramatically elevates your damage per second (DPS) potential. The first chord in the gear progression composition is the emphasis on prioritizing weapons with higher Weapon Damage. As the lifeblood of your damage output, your choice of weapon influences every spell and sword stroke, underscoring the magnitude of your role in the battlefield ballet.
Harnessing the Arcane Essence: The Primacy of Intelligence
As the Red Mage's main stat, Intelligence empowers your spells with unparalleled potency, amplifying the magic that courses through your very being. In the elaborate dance of gear progression, the magnetic pull of higher Intelligence draws you towards items of greater item level. In this intricate waltz of numbers, the ascendancy of Intelligence resonates through every incantation, a testament to your mastery over the arcane.
Delving into Substats: The Symphony of Choice
Substats emerge as the tapestry upon which the intricate dance of gear progression unfolds. When confronted with equipment of equal or similar item levels, the choreography of choice becomes paramount. The performance begins with a spotlight on Critical Hit—a stat that enhances your chances of delivering and receiving critical strikes, making each spell and sword flourish a potent blow.
Determination and Direct Hit: A Duet of Power
As the gears of choice continue to turn, Determination and Direct Hit vie for the spotlight in your substat selection. A duet of power, these two stats stand shoulder to shoulder, each offering a linear DPS boost. While their impact is evenly matched, the choice between them often comes down to situational preferences, a dance where you sway to the rhythm of your strategic inclinations.
The Intricate Dance with Spell Speed
The allure of Spell Speed beckons, promising swifter recast times for GCD spells and a chance to weave more incantations into the fabric of combat. Yet, the Red Mage's approach to Spell Speed bears the weight of strategy. Within the delicate tapestry of Red Mage mastery, Spell Speed's embrace is scrutinized, and its impact on oGCDs (off-global cooldown abilities) and precise alignment is considered. A strategic balancing act unfolds, where the pursuit of speed is tempered by the necessity for meticulous coordination.
Item Level and Beyond: Navigating the Nexus
When the paths of gear intersect and item levels stand on equal ground, the tides of substats become the compass guiding your choices. Critical Hit claims its throne as the first to be prioritized, followed by Determination and Direct Hit. Spell Speed, while tempting, introduces complexity, calling for careful evaluation based on factors like item level disparity and combat scenario.
Forging Your Legacy of Mastery
As you stand on the precipice of gear progression, remember that the journey is not only about equipping items; it's about crafting your legacy as a Red Mage. With every piece of gear, every strategic meld, and every substat choice, you are shaping your identity as a master of the arcane and the blade. The symphony of gear progression is an ode to strategy, a narrative woven with the threads of power and finesse. As you venture forth, may your gear progression be a testament to your relentless pursuit of excellence within the enchanting landscapes of Eorzea.
Elevating Excellence: The Role of Consumables in the Red Mage Arsenal
In the sprawling expanse of Eorzea, where battles are waged and legends are forged, the Red Mage emerges as a beacon of arcane mastery and martial finesse. Within this intricate tapestry of combat, the strategic utilization of consumables stands as a hallmark of distinction. This comprehensive guide delves into the realm of consumables, unveiling the role of potions in enhancing a Red Mage's performance. Embark on a journey that unearths the alchemical secrets that elevate your damage potential and maximize your prowess on the battlefield.
Potions: The Elixir of Empowerment
At the heart of the consumables repertoire lies the potent elixirs known as potions—mystical concoctions that hold the power to transcend your limits and unleash your true potential. In the Red Mage's pursuit of excellence, potions serve as catalysts for elevating your damage output within a finite 30-second window. This window of opportunity is not merely a chance to shine; it's a canvas upon which you paint a symphony of spells and swordplay that leaves an indelible mark on the field of battle.
Intelligence Potions: The Nectar of Arcane Prowess
The cornerstone of a Red Mage's combat prowess resides within the stat of Intelligence, the lifeblood that fuels every incantation and infuses every strike with raw power. To harness this power to its fullest, the practice of choosing the highest tier potion becomes paramount. The ethereal Intelligence potion becomes the very nectar that amplifies your spells, lending an explosive surge to your magical assault and transforming the battlefield into a tapestry of arcane might.
A Glimpse at Vitality Potions
While the pursuit of dominance through Intelligence potions is central to the Red Mage's strategy, a secondary avenue presents itself through the realm of Vitality potions. These elixirs hold the potential to bolster your health pool, fortifying your resilience against the onslaught of enemy attacks. However, it's vital to tread carefully when considering their use, as the optimization of a Red Mage's performance often centers around maximizing damage potential, rendering Vitality potions suboptimal in most scenarios.
The Art of Choice: Strategy in Consumption
The choice to imbibe a potion within the midst of battle is a strategic maneuver that demands careful consideration. The 30-second window provided by a potion aligns with critical moments of a fight—moments when burst damage can turn the tide of battle in your favor. The key lies in synchronization: understanding the ebb and flow of the encounter, identifying pivotal moments, and unleashing your potion-fueled onslaught with precision.
Crafting a Symphony of Mastery
As a Red Mage, your journey toward mastery is not confined solely to the art of casting spells and executing melee combos. It extends to the realm of consumables—a dimension where potions become the catalysts that augment your power and define your performance. With every potion you consume, every battle you grace with your presence, you etch a legacy of excellence upon the annals of Eorzean history. As you venture forth, remember that the elixirs you choose are more than mere items; they're the very essence of your mastery, a testament to your commitment to soaring beyond limits and embracing the arcane artistry of the Red Mage.
Red Mage DPS Gear and Best in Slot — Endwalker 6.4
RDM 2.48 Relic TOP BiS (6.45):

Embracing the Arcane Symphony: Concluding the Endwalker 6.4 Red Mage Job Guide
In the enchanting realms of Final Fantasy XIV's Endwalker 6.4, the Red Mage emerges as a spellbinding fusion of magic and melee, offering a captivating dance of arcane prowess and martial finesse. Throughout this comprehensive guide, we've navigated the intricacies of the Red Mage's playstyle, strengths, weaknesses, lore, rotation, gear progression, and the strategic utilization of consumables. As you step onto the stage as a Red Mage, you're armed with the knowledge and understanding needed to master this captivating job.
However, the path to mastery is not always paved solely with knowledge—it often requires time, effort, and dedication. This is where Simple Carry's exceptional boosting services step into the spotlight. With Simple Carry, the journey of ascending to Red Mage supremacy becomes a seamless and enjoyable experience, enriched with efficiency and convenience.
Imagine the delight of effortlessly diving into your Red Mage journey, without the painstaking grind for gear and resources. With Simple Carry's boosting services, you're not just purchasing a service; you're investing in an opportunity to save time and alleviate the hassles that can accompany the pursuit of mastery. The journey becomes more than just progress; it transforms into an enjoyable experience that leaves you free to savor the intricacies of Red Mage gameplay, embark on epic adventures, and explore the vast landscapes of Eorzea without the burdens of repetitive tasks.
With Simple Carry's boosting services as FFXIV Dungeon Boost and Extreme Trials Boost, you're not merely hiring a team of experts; you're partnering with a group that understands your goals and strives to make your journey as rewarding as possible. As the world of Endwalker 6.4 unfurls before you, you can approach it with confidence, knowing that your Red Mage journey is not just a destination, but a symphony of enjoyment and achievement. Whether you're seeking to conquer challenging encounters, ascend the ranks of power, or delve into the mysteries of Eorzea, Simple Carry's boosting services pave the way for a seamless, efficient, and fulfilling adventure that lets you focus on what truly matters—immersing yourself in the captivating realm of Final Fantasy XIV.