
In this comprehensive guide to the Amirdrassil: The Dream's Hope raid in Season 3, we will delve into the intricate details of this challenging 10.2 raid. This guide will provide insights into key raid event locations, tactical strategies for each of the nine bosses, information on valuable loot, and a closer look at the new tier sets designed for every class.
Season 3 introduces the highly-anticipated Amirdrassil: The Dream's Hope raid, a grand adventure that will test the mettle of daring adventurers. This perilous journey will see players facing off against nine formidable bosses, including the Druid of the Flame and Fyrakk, perched atop the majestic World Tree, Amirdrassil. Despite its name, the majority of the raid's encounters will not take place within or immediately around the tree itself. Instead, the epic battles will unfold in a newly revealed region located just north of Amirdrassil.
Looking to soar to new heights in World of Warcraft's Dragonflight expansion? Our WoW Dragonflight Boost service is here to help you achieve your in-game goals and unlock the full potential of this thrilling expansion. Explore our World of Warcraft Dragonflight page to learn more about this offering and embark on an epic adventure in the skies of Azeroth.

Raid Overview: Amirdrassil - The Dream's Hope
Amirdrassil: The Dream's Hope marks the third installment in the ongoing narrative of the Dragonflight expansion. In a perilous turn of events, Fyrakk, aided by the Druids of the Flame, infiltrated the sacred realm of the Emerald Dream. Rather than outright destruction, Fyrakk's sinister intent was to imbue the World Tree with an all-encompassing flame, poised to engulf Azeroth in an unrelenting blaze. The heroes of Azeroth are entrusted with the monumental task of safeguarding yet another ancient tree to prevent the cataclysmic fate of a world consumed by fire and chaos.
Preparing for the challenges that lie ahead in Amirdrassil, the Dream’s Hope raid in World of Warcraft Dragonflight? Our Normal Amirdrassil Boost service is designed to provide you with the necessary assistance to conquer this formidable raid and protect the world from the encroaching flames. Explore our World of Warcraft Dragonflight page to learn more about this offering and ensure your success in the battle against chaos.
AMIRDRASSIL RAID LOOT TABLE
AMIRDRASSIL RAID ACCESSORIES DROPS
| Slot | Item | Boss |
| Back | Inflammable Drapeleaf | Gnarlroot |
| Back | Inflammable Drapeleaf | Gnarlroot |
| Finger | Signet of the Last Elder | Volcoross |
| Finger | Band of Burning Thorns | Larodar, Keeper of the Flame |
| Neck | Amulet of Eonar's Chosen | Nymue |
| Back | Mantle of Blazing Sacrifice | Smolderon |
| Neck | Eye of the Rising Flame | Tindral Sageswift |
AMIRDRASSIL RAID CLOTH DROPS
| Slot | Item | Boss |
| Wrist | Anguished Restraints | Gnarlroot |
| Shoulder | Requiem Rootmantle | Gnarlroot |
| Legs | Elder's Volcanic Wrap | Volcoross |
| Waist | Urctos's Hibernal Dial | Council of Dreams |
| Head | Lost Scholar's Timely Hat | Larodar, Keeper of the Flame |
| Feet | Lifewoven Slippers | Nymue |
| Wrist | Fading Flame Wristbands | Smolderon |
| Waist | Blooming Redeemer's Sash | Fyrakk the Blazing |
| Hands | Twisting Shadow Claws | Fyrakk the Blazing |
AMIRDRASSIL RAID LEATHER DROPS
| Slot | Item | Boss |
| Head | Silent Tormentor's Hood | Gnarlroot |
| Feet | Twisted Blossom Stompers | Gnarlroot |
| Waist | Bloody Dragonhide Belt | Volcoross |
| Wrist | Verdant Sanctuary Bands | Council of Dreams |
| Shoulder | Strigine Epaulets | Council of Dreams |
| Chest | Robes of the Ashen Grove | Larodar, Keeper of the Flame |
| Waist | Eternal Sentinel's Cord | Nymue |
| Feet | Tasseted Emberwalkers | Tindral Sageswift |
| Legs | Frenzied Incarnate Legwraps | Fyrakk the Blazing |
AMIRDRASSIL RAID MAIL DROPS
| Slot | Item | Boss |
| Chest | Ancient Haubark | Gnarlroot |
| Waist | Forlorn Leaf Clasp | Gnarlroot |
| Shoulder | Drakestalker's Trophy Pauldrons | Volcoross |
| Feet | Cleats of the Savage Claw | Council of Dreams |
| Legs | Aerwynn's Ritual Sarong | Council of Dreams |
| Wrist | Wellspring Wristlets | Nymue |
| Hands | Flameseer's Winged Grasps | Tindral Sageswift |
| Feet | Boots of the Molten Hoard | Fyrakk the Blazing |
AMIRDRASSIL RAID PLATE DROPS
| Slot | Item | Boss |
| Legs | Seared Ironwood Greaves | Gnarlroot |
| Wrist | Agonizing Manacles | Volcoross |
| Wrist | Vigilant Protector's Bracers | Council of Dreams |
| Head | Emerald Guardian's Casque | Council of Dreams |
| Waist | Phlegethic Girdle | Larodar, Keeper of the Flame |
| Hands | Eldermoss Gauntlets | Smolderon |
| Feet | Fused Obsidian Sabatons | Smolderon |
| Waist | Smoldering Chevalier's Greatbelt | Tindral Sageswift |
| Chest | Carapace of the Unbending Flame | Fyrakk the Blazing |
AMIRDRASSIL RAID TRINKET DROPS
| Stats | Item | Boss |
| Strength | Branch of the Tormented Ancient | Gnarlroot |
| Agility | Bandolier of Twisted Blades | Volcoross |
| Any | Pip's Emerald Friendship Badge | Council of Dreams |
| Intellect | Trickster's Captivating Chime | Council of Dreams |
| Versatility | Gift of Ursine Vengeance | Council of Dreams |
| Haste | Smoldering Seedling | Larodar, Keeper of the Flame |
| Intellect | Nymue's Unraveling Spindle | Nymue |
| Haste | Ashes of the Embersoul | Smolderon |
| Agility or Strength | Cataclysmic Signet Brand | Smolderon |
| Intellect | Belor'relos, the Suncaller | Tindral Sageswift |
| Critical Strike | Augury of the Primal Flame | Fyrakk the Blazing |
| Agility or Strength | Fyrakk's Tainted Rageheart | Fyrakk the Blazing |
| Intellect | Blossom of Amirdrassil | Fyrakk the Blazing |
AMIRDRASSIL RAID WEAPON DROPS
One-Handed Weapon
| Type | Stat | Item | Boss |
| Axe | Agility | Igira's Flaying Hatchet | Volcoross |
| Dagger | Agility | Cruel Dreamcarver | Volcoross |
| Dagger | Intellect | Sickle of the White Stag | Council of Dreams |
| Fist Weapon | Agility | Thorncaller Claw | Council of Dreams |
| Sword | Intellect | Larodar's Moonblade | Larodar, Keeper of the Flame |
| Warglaive | Agility | Remnant Charglaive | Smolderon |
| Dagger | Agility | Betrayer's Cinderblade | Tindral Sageswift |
| Axe | Strength | Gholak, the Final Conflagration | Fyrakk the Blazing |
| Mace | Intellect | Vakash, the Shadowed Inferno | Fyrakk the Blazing |
Ranged Weapon
| Type | Stat | Item | Boss |
| Bow | Agility | Ashen Ranger's Longbow | Tindral Sageswift |
Off-Hand and Shield
| Type | Stat | Item | Boss |
| Shield | Intellect | Defender of the Ancient | Gnarlroot |
| Shield | Intellect | Verdant Matrix Beacon | Nymue |
Two-Handed Weapon
| Type | Stat | Item | Boss |
| Staf | Intellect | Staff of Incandescent Torment | Gnarlroot |
| Mace | Strength | Gnarlroot's Bonecrusher | Gnarlroot |
| Polearm | Staff | Scythe of the Fallen Keeper | Larodar, Keeper of the Flame |
| Staff | Intellect | Dreambinder, Loom of the Great Cycle | Nymue |
| Sword | Strength | Incandescent Soulcleaver | Smolderon |
| Staff | Intellect | Eternal Kindler's Greatstaff | Tindral Sageswift |
| Staff | Staff | Rashon, the Immortal Blaze | Fyrakk the Blazing |
Prepare to conquer the challenges of Amirdrassil, The Dream's Hope raid in World of Warcraft Dragonflight with our Amirdrassil, The Dream's Hope Full Gear Boost service. Our team of experts will ensure you're fully equipped to face the fiery trials ahead, guaranteeing your success in the battle against chaos. Explore our World of Warcraft Dragonflight page to discover how this offering can elevate your raid experience and secure victory.
AMIRDRASSIL RAID RARE DROPS

Unlock the majestic Anu'relos, Flame's Guidance Mount Boost in World of Warcraft Dragonflight with our Mount Boost service. Our skilled team will guide you through the process, ensuring you ride in style across the skies of Azeroth. Explore our World of Warcraft Dragonflight page to learn more about this offering and embark on your journey to acquire this stunning mount.
| Item | Name |
| Mount | Reins of Anu'relos, Flame's Guidance |
| Drakewatcher Manuscript | Renewed Proto-Drake: Embodiment of Shadowflame |
Amirdrassil Raid Entrance
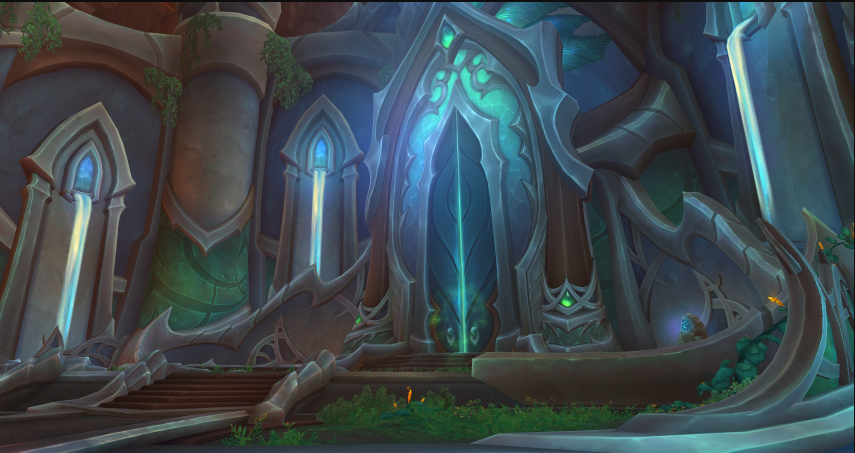
To gain entry into the Amirdrassil raid, aspiring heroes must embark on a sacred journey to the revered Wellspring of Life. The most convenient means of arrival is by utilizing the Wellspring Overlook as the primary flight destination, strategically situated to the north within the mystical realm of the Emerald Dream. This overlook serves as a gateway, beckoning adventurers with its ethereal allure, just beyond the expansive and treacherous terrain known as the Field of Flames. As you approach this pivotal location, you'll find yourself on the precipice of an epic adventure that awaits within the heart of Amirdrassil.
Gnarlroot: The Venerable Guardian - First Boss of the Raid

Gnarlroot, the inaugural adversary within the new raid, is a venerable guardian whose illustrious history saw it steadfastly safeguarding the sanctity of the Emerald Dream. However, a tragic fate has befallen this noble protector, as it now finds itself utterly consumed by the relentless flames of destruction. Gnarlroot's once-noble essence has been irreversibly altered, now hungering solely for wanton devastation.
Tanks:
-
Exercise vigilant caution against the formidable Dreadfire Barrage, as it inflicts substantial damage and enhances the harmful effects of Shadowflame.
-
Swiftly engage the menacing Tainted Lashers immediately following their Tainted Bloom spell to mitigate their threat.
-
Keep a keen eye on players marked with Ember-Charred, as they possess the potential to ignite the surrounding Doom Roots.
Damage Dealers:
-
When targeted by Controlled Burn, ensure you stand in close proximity to dormant Tainted Lashers to awaken them and effectively manage the encounter.
-
Players branded with the Ember-Charred debuff must be mindful of their ability to set Doom Roots ablaze.
-
Exploit Gnarlroot's vulnerability during the Uprooted Agony phase, where it becomes susceptible to double damage.
Healers:
-
Exercise heightened awareness as Gnarlroot employs Tortured Scream, an ability that inflicts extensive damage across the entirety of the raid.
-
Be prepared for Potent Fertilization, as it escalates the damage dealt to all raid participants over time.
-
Keep in mind that each time Uprooted Agony is dispelled, Gnarlroot accumulates an Uprooted Agony stack, necessitating strategic coordination in its management.
Igira the Cruel: Mistress of Blistering Spears

Igira wields her formidable Blistering Spears, which serve as conduits for the harnessing of torment derived from her adversaries. As her torment energy reaches its zenith, Igira unleashes a devastating ability known as "Marked for Torment," igniting various zones within her battleground. Depending on the zone selected by players, Igira's weaponry undergoes a transformative evolution, bestowing her with augmented capabilities.
In the formidable Mythic mode encounter, Igira takes her mastery to a new level by forging dual weapons during the Marked for Torment phase, combining their strengths to deliver even deadlier strikes.
Tanks:
- Beware of the Shared Agony affliction, as it causes Igira's close-combat blows to also impact the nearest adjacent opponent.
Damage Dealers:
- Exercise caution when afflicted with Blistering Spear, as the duration of this affliction directly correlates with the torment that Igira accumulates over time.
Healers:
-
Those marked by the insidious Heart Stopper aura pose a significant threat, as they have the potential to detonate upon the natural expiration of this malevolent aura.
-
Take into consideration that every stack of Harvest of Screams augments Igira's damage output, necessitating careful attention to the raid's overall well-being.
Prepare to face the heroic challenges of Amirdrassil, The Dream's Hope raid in World of Warcraft Dragonflight with our Heroic Amirdrassil Boost service. Our expert team will guide you through the most demanding encounters, ensuring your success as you confront the fiery trials ahead. Explore our World of Warcraft Dragonflight page to discover how this offering can elevate your raid experience and lead you to victory against chaos.
Volcoross: The Gargantuan Viper of Destruction

Volcoross, an imposing serpent of colossal proportions, leaves naught but devastation in his wake, unleashing his fearsome Scorchtail Crash to reduce all adversaries to ashes, while they struggle to contend with the enveloping inferno of Coiling Flames.
Upon reaching the pinnacle of his energy at 100, a Lava Serpent emerges from molten depths, drenching the battlefield with the scalding deluge known as the Flood of the Firelands.
Tanks:
-
Exercise extreme caution when facing the formidable Cataclysm Jaws, for the Molten Venom further amplifies its already punishing damage.
-
Remain vigilant during the peak energy phase, as the Flood of the Firelands disgorges two colossal molten projectiles that threaten to overrun the arena unless they are intercepted.
-
Be ever watchful of the impending Scorchtail Crash, as it delivers fatal blows to any unfortunate souls caught directly beneath its devastating impact.
Damage Dealers:
-
Exercise precision and awareness when confronted with Coiling Flames, as its damage progressively escalates around a targeted player before seeking out a new victim.
-
During the energy peak phase, take heed as the Flood of the Firelands hurls two lethal lava globes that have the potential to engulf the entire arena unless they are swiftly halted.
-
Be diligent in avoiding the catastrophic impact of Scorchtail Crash, which can prove fatal to those who find themselves directly in its path.
Healers:
-
Keep a watchful eye on individuals affected by the intensifying damage of Coiling Flames, providing timely assistance to mitigate its escalating effects.
-
As the energy reaches its zenith, ensure that players work together to counteract the threat posed by the two molten splashes originating from the Flood of the Firelands, effectively safeguarding the battleground.
-
Be ever vigilant in identifying and tending to the victims of the perilous Scorchtail Crash, providing the necessary healing and support to ensure their survival.
Council of Dreams: Confronting the Dreamy Triumvirate

In the hallowed arena of the Council of Dreams, players find themselves pitted against a formidable triumvirate consisting of the mighty werebear Urctos, the nature-loving dryad Aerwynn, and the cunning faerie dragon Pip. As their energies ascend to a crescendo at 100, each council member unleashes their distinctive signature moves: Urctos with Blind Rage, Aerwynn with Constricting Thicket, and Pip with the Song of the Dragon. A unique twist unfolds as well – should a council member's health dwindle to a solitary point, they invoke the power of Rebirth from the Dream. However, this resurrection gambit proves futile if their fellow council members also find themselves weakened.
Tanks (Normal, Raid Finder):
-
Exercise vigilance against Urctos' Agonizing Claws, a formidable attack inflicting Physical damage and rendering targets more susceptible to subsequent Agonizing Claws.
-
The force of Urctos' Barreling Charge diminishes as more participants share the impact, simultaneously disrupting Aerwynn's Constricting Thicket.
-
Unchecked, Pip's Song of the Dragon triggers the ominous Captivating Finale, dealing Nature damage.
Tanks (Mythic, Heroic):
-
On the more challenging Mythic and Heroic difficulties, Urctos releases Agonizing Claws in a frontal spread, causing Physical damage and intensifying vulnerability to subsequent Agonizing Claws.
-
It becomes paramount to ensure that the force of Urctos' Barreling Charge is evenly distributed among players to minimize its impact, thereby preventing Aerwynn's Constricting Thicket from taking hold.
-
A coordinated effort is required to counter Pip's Song of the Dragon and stave off the looming threat of Captivating Finale.
Damage Dealers:
-
Exercise prudent judgment when dispelling Polymorph Bomb, as doing so affects nearby players and also influences Urctos during his Blind Rage.
-
To mitigate the potency of Urctos' Barreling Charge, ensure multiple players absorb its force, simultaneously countering Aerwynn's Constricting Thicket.
-
Swiftly evade the effects of Pip's Song of the Dragon to prevent the triggering of Captivating Finale.
Healers (Normal, Raid Finder):
-
Display caution when dispelling Polymorph Bomb, as it can afflict nearby players and disrupt Urctos during his Blind Rage.
-
Be vigilant in neutralizing Pip's Song of the Dragon to forestall the ominous Captivating Finale.
-
Be prepared to mend the wounds inflicted by Urctos' formidable Agonizing Claws, which deals substantial Physical damage.
Healers (Mythic, Heroic):
-
In the more demanding Mythic and Heroic encounters, the repercussions of neutralizing Polymorph Bomb extend to adjacent players and hinder Urctos during his Blind Rage.
-
Coordinate efforts to counteract Pip's Song of the Dragon and thwart the looming peril of Captivating Finale.
-
Be mindful of Urctos' Agonizing Claws, a concentrated frontal cone attack delivering high Physical damage.
Larodar, Keeper of the Flame Encounter Mechanics

Phase 1:
-
The boss initiates Phase 1 by summoning three hostile Tree Ents. Players must defeat them to convert them into allies, after which healers should promptly restore their health. These healed Ents will then charge toward the central Seed of Life. It is crucial to keep the boss away from the Ents to facilitate quick healing.
-
Interact with the charged Seed of Life to bind up to three players. These bonded players gain the ability to clear fire pools. In Heroic and Mythic difficulties, this bond also removes Scorching Root's immunity.
-
Watch out for Scorching Root spiders targeting a player. Defeat them and heal them, and they will transform into protective bushes. During the Raging Inferno phase, players should stay inside these bushes to reduce damage taken by a staggering 90%.
-
The boss will push the tank, and the distance between them reduces the damage inflicted. In Heroic difficulty, this distance reduction also affects raid-wide damage. Be mindful that the boss's charge generates fire pools in the area.
Intermission:
- When Larodar's health drops to 40%, prepare for the Consuming Flame. Utilize defensive skills and strong healing abilities for a duration of 16 seconds.
Phase 2:
-
In Phase 2, players must absorb the spawning Ember circles while avoiding any orbs that have already landed.
-
Players marked with a circling arrow (Flash Fire) must move away from the raid. Healers must remove their shield within 8 seconds, or they will be stunned for 20 seconds.
-
The boss will summon numerous adds that move toward him. Players should control and stagger the kills of these adds to manage raid-wide damage effectively, providing healers with ample time to restore the group's health.
Nymue, Weaver of the Cycle Encounter Dynamics

Nymue, the enigmatic weaver of the Emerald Dream, imbues the environment with her captivating spells, intensifying the allure of this mystical realm. The lush underlings that populate the Dream only add to the enigmatic magic that permeates the battlefield.
Tanks:
-
Exercise utmost vigilance when facing Nymue's Threaded Blast; it possesses formidable potency. Employ your cooldowns strategically to mitigate its impact effectively.
-
With Weaver's Burden, ensure you maintain distance from the rest of the team before this effect concludes to minimize the damage they incur.
Damage Dealers:
-
Prioritize targeting the Cycle Wardens as they make their appearance. Spacing them out strategically can help mitigate the impact of Protector's Shroud on the team.
-
Neutralize Violent Flora swiftly to harness the beneficial effects of Inflorescence, thereby turning the tide in your favor.
Healers:
-
Remain attentive during Viridian Rain, as all team members will require your diligent care to weather this challenging phase.
-
Keep a watchful eye on those affected by Drowsy Expulsion. These individuals are susceptible to amplified damage, necessitating your vigilant oversight to ensure their survival.
Smolderon: The Fiery Master of Emberscar

Smolderon, the formidable Firelord, wields the mighty Emberscar with devastating power, branding adversaries with the dreaded Brand of Damnation and searing them with the scorching Overheated. When his energy surges to 100, he plunges Emberscar into the earth, seeking to drain players' vitality and engulf his foes in a cataclysmic World In Flames.
Tanks (Normal):
-
Beware of the Lava Geysers, which spawn expansive areas of Smoldering Ground, dealing immense damage.
-
Becoming the target of Brand of Damnation inflicts a significant healing reduction on you but designates you as a potential source of Living Flames.
-
Gathering Living Flames amplifies both your damage output and healing efficiency (in Raid Finder and Normal modes).
Tanks (Heroic, Mythic):
-
In the more challenging Heroic and Mythic difficulties, Lava Geysers give birth to vast swaths of Smoldering Ground.
-
The primary recipient of Brand of Damnation is tormented with Searing Aftermath.
-
Brand of Damnation imposes a formidable healing impediment on you but designates you as a potential progenitor of Living Flames.
-
Absorbing Living Flames enhances your damage-dealing and healing prowess.
Damage Dealers:
-
Receiving Brand of Damnation comes with a healing reduction but marks you as a generator of Living Flames.
-
Harnessing Living Flames boosts your damage-dealing potential.
-
Being in close proximity to allies while Overheated jeopardizes their well-being.
Healers:
-
Players with Blazing Soul trigger Blistering Heat, dealing intense raid-wide harm.
-
Incurring Brand of Damnation imposes a potent healing restraint on you but labels you as a source of Living Flames.
-
Channeling Living Flames enhances your healing efficiency and damage-dealing potential.
Tindral Sageswift, Seer of the Flame: A Master of Shapeshifting

Tindral Sageswift, the master of shapeshifting, deploys his formidable druidic abilities in a variety of forms to challenge players.
Humanoid Form:
- The encounter begins with Tindral in his humanoid form. In this form, he ensnares players using Mass Entanglement and pelts them with a barrage of Falling Stars.
Moonkin Form:
- When Tindral assumes the Moonkin form, his abilities undergo a transformation. He showers everyone with Sunfire and unleashes Fire Beam, scorching the arena with intense flames.
Treant of Flame Form:
- Embodying the Treant of Flame, Tindral emanates Suppressive Ember and subjects players to the searing effects of Tranquility of Flame.
Flame Owl Form:
- In the form of the Flame Owl, Tindral drops Empowered Feather, enabling players to take flight on the back of a dragon.
Tanks (Normal):
-
Tindral's melee attacks afflict targets with Searing Wrath, causing a burning sensation.
-
He spawns Blazing Mushrooms that detonate, resulting in fatal harm (in Raid Finder, Heroic, and Normal modes).
Tanks (Mythic):
-
In the more challenging Mythic mode, Tindral's melee strikes afflict foes with Searing Wrath.
-
He summons Wild Mushrooms that explode, causing chaos unless intercepted by a player.
Damage Dealers:
-
Tindral deploys an absorbent barrier during Supernova, shielding himself from harm.
-
Mass Entanglement constricts players, necessitating the breaking of roots to free them.
-
Dispelling Fiery Growth results in the emergence of Scorching Ground.
Healers:
-
Eliminating Fiery Growth spawns Scorching Ground.
-
In his Treant form, Tindral imposes Suppressive Ember on players, significantly hindering healing capabilities.
Fyrakk the Blazing: Unleasher of Fire and Shadowflame

As the confrontation with the formidable Fyrakk unfolds, he calls upon the forces of fire to invoke Firestorms, shrouding the heavens in fiery chaos. Each instance of Fyrakk's Wildfire only serves to fan the flames of the Raging Flames. When Fyrakk's health dwindles to 70%, he embarks on a quest to Corrupt the Heart of Amirdrassil.
To protect the sacred world tree, the Spirits of the Kaldorei rise, prompting Fyrakk to breathe life into the shadowflame through Shadowflame Devastation.
Challenge the fiery menace of Fyrakk in World of Warcraft Dragonflight's heroic encounter with our Heroic Fyrakk Boss Kill service. Our seasoned team of adventurers will assist you in defeating this formidable foe, securing your victory and valuable rewards. Explore our World of Warcraft Dragonflight page to learn more about this offering and prepare for an epic showdown against the flames.
In his ultimate and most potent form, Fyrakk reveals himself as an Incarnate, and the world tree initiates the creation of the Seeds of Amirdrassil.
Tanks:
- Each of Fyrakk's assaults against a player, while under the influence of the Mark of Fyr'alath, inflicts substantial shadowflame damage.
Damage Dealers:
- Raging Flames, when connected to Amirdrassil's heart through Wildfire, poses a threat to the venerable tree itself, Amirdrassil.
Healers:
-
As the portal opens, Dream Rend dispenses profound Shadowflame damage to all participants.
-
Fyrakk intermittently sets combatants Aflame, necessitating your healing expertise to mend their wounds.
AMIRDRASSIL RAID ITEM LEVEL DROP
The Amirdrassil raid offers a range of rewards, and the quality of these rewards corresponds to the difficulty setting chosen by raiders:
-
Raid Finder provides baseline gear, ideal for newcomers and those looking to ease into the raiding experience.
-
Normal difficulty offers upgraded gear and serves as an introduction to the core mechanics of the raid.
-
Heroic difficulty raises the stakes and the rewards, providing a challenge suitable for seasoned raiders.
-
Mythic difficulty represents the pinnacle of challenge, offering the highest item level gear and exclusive aesthetics. For those looking to conquer this raid at the highest difficulty level and secure the most powerful gear, the Mythic Amirdrassil Boost is available as an option.
| Raid Difficulty | Item Level |
| LFR | 441-450 |
| Normal | 454-463 |
| Heroic | 467-476 |
| Mythic | 480-489 |
SEASON 3 UPGRADE TRACKS
In Season 3, the system of enhancing items through various levels, degrees, and ranks will persist, albeit with a few minor adjustments compared to Season 2.
Here is a visual table outlining item levels, their respective degrees, and the combinations required for upgrading through participation in challenging group content during Season 3:

AMIRDRASSIL RAID TIER SETS

You can earn extra helm and shoulder effects to your tier set by defeating Fyrakk on Mythic difficulty or completing Dragonflight Keystone Hero: Season Three,Elite: Dragonflight Season 3. You will get an account-wide tier set enhanced effect Emerald Blossom Dreamstone.
| Class | Tier Set |
| Death Knight | Risen Nightmare's Gravemantle |
| Demon Hunter | Screaming Torchfiend's Brutality |
| Druid | Benevolent Embersage's Guidance |
| Evoker | Werynkeeper's Timeless Vigil |
| Hunter | Blazing Dreamstalker's Trophies |
| Mage | Wayward Chronomancer's Clockwork |
| Monk | Mystic Heron's Discipline |
| Paladin | Zealous Pyreknight's Ardor |
| Priest | Blessings of Lunar Communion |
| Rogue | Lucid Shadewalker's Silence |
| Shaman | Vision of the Greatwolf Outcast |
| Warlock | Devout Ashdevil's Pactweave |
| Warrior | Molten Vanguard's Mortarplate |
AMIRDRASSIL ACHIEVEMENTS

Like any other raid, Amirdrassil offers a lot of achievements that not everyone can get. Below you can see them.
- Amirdrassil, the Dream's Hope: Hey, look at you! Knocked out these bosses like they were last season’s raid tier.
- Ducks In A Row: Got Sergeant Quackers to enlist? Well, look at Mr./Ms. Recruitment over here. High fives all around!
- Fate of Amirdrassil: Stopped the whole crew that was cramping Amirdrassil’s style. Dream’s safe, for now.
- Incarnate's Wake: Guarded the Wellspring Temple from these wannabes. Another day at the office.
- Molten Incursion: Stopped the flame gang from setting Wellspring on fire. Amirdrassil owes ya one!
- Mythic: Council of Dreams: The council held a meeting, and you crushed it.
- Mythic: Fyrakk the Blazing: Lit up Fyrakk. It’s not all about the heat, it’s about the technique.
- Mythic: Gnarlroot: Showed Gnarlroot he wasn’t the root of all problems.
- Mythic: Nymue, Weaver of the Cycle: Nymue’s weaving some sad tales now.
- Mythic: Tindral Sageswift, Seer of the Flame: Made Tindral’s prophecies go up in smoke.
- Swog Champion: Got Volcoross to munch on 30 Sizzling Swoggers? Epic food fight.
- The Viridian Weave: Stopped the nosy neighbors in Amirdrassil. Dreams: 1, Interlopers: 0.
- Cruelty Free: Showed Igira some love by saving the roasted critters. They’ll remember this, buddy.
- Don't Let the Doe Hit You On The Way Out: Beat down Larodar, but kept Ivy chill and kicking. Fire safety 101!
- Haven't We Done This Before?: Wet blanket alert! Drenched all 6 Runes and showed Smolderon who’s boss.
- Heroic: Amirdrassil, the Dream's Hope: Stepped up the game and crushed it on Heroic. Fancy footwork, champ!
- Meaner Pastures: Made Gnarlroot feel the burn by lighting up those Harmless Blossoms. Green thumb level: expert.
- Mythic: Amirdrassil, the Dream's Hope: Pro gamer alert! Took down the dream team on Mythic.
- Mythic: Igira the Cruel: Cruelty didn’t pay off for Igira, did it? Boss status: defeated!
- Mythic: Larodar, Keeper of the Flame: Larodar tried to keep the flame, but you blew it out.
- Mythic: Smolderon: Smolderon’s fire’s out, and you’re on fire!
- Mythic: Volcoross: Volcoross is down, and it’s all thanks to you!
In conclusion, the Amirdrassil Raid is a challenging and immersive adventure that promises exciting encounters, powerful loot, and the opportunity to test your skills against formidable foes. To fully maximize your experience within this raid and obtain the best rewards, consider enlisting the assistance of Simple Carry's boosting services.
With Simple Carry, your journey through Amirdrassil becomes a hassle-free and enjoyable experience. The seasoned experts at Simple Carry are well-versed in the mechanics of the raid, ensuring efficient progression and minimal downtime. This means more time spent conquering bosses, collecting coveted loot, and relishing the raid's intricate lore.
Test your mettle against the formidable bosses of Amirdrassil in World of Warcraft Dragonflight with our Amirdrassil Single Boss Kill service. Whether you seek the thrill of victory or the valuable loot they guard, our skilled team is here to assist you in defeating these challenging adversaries. Explore our World of Warcraft Dragonflight page to learn more about this offering and embark on your quest to conquer the bosses of Amirdrassil.
By choosing Simple Carry's boosting services, you not only save valuable time but also unlock the potential to experience the raid's most challenging difficulty levels. This allows you to access the highest item level gear and exclusive aesthetics that Season 3 has to offer.
In essence, Simple Carry's Amirdrassil Raid boosting services empower you to fully embrace the raid's intricacies, enjoy the camaraderie of fellow adventurers, and emerge from the World Tree triumphant, armed with the most potent gear. Embrace the adventure, and let Simple Carry enhance your journey through Amirdrassil.